CNC router ML2512
CNC router (Y)2500mm*(X)1500mm*(Z)150mm, rooter 3kW, with an automatic tool changer (and height compensation) and a vacuum table.
max spindle speed = 18000rpm
A standard wood sheet measure : 2440 * 1220 mm with a thickness of 3, 6 or 18 mm.
The CNC router is composed of several units : the control interface, an air compressor, a cooling system for the router, an aspiration system, the cnc router and the 4th axis, the vacuum unit for the table and the tool holder.

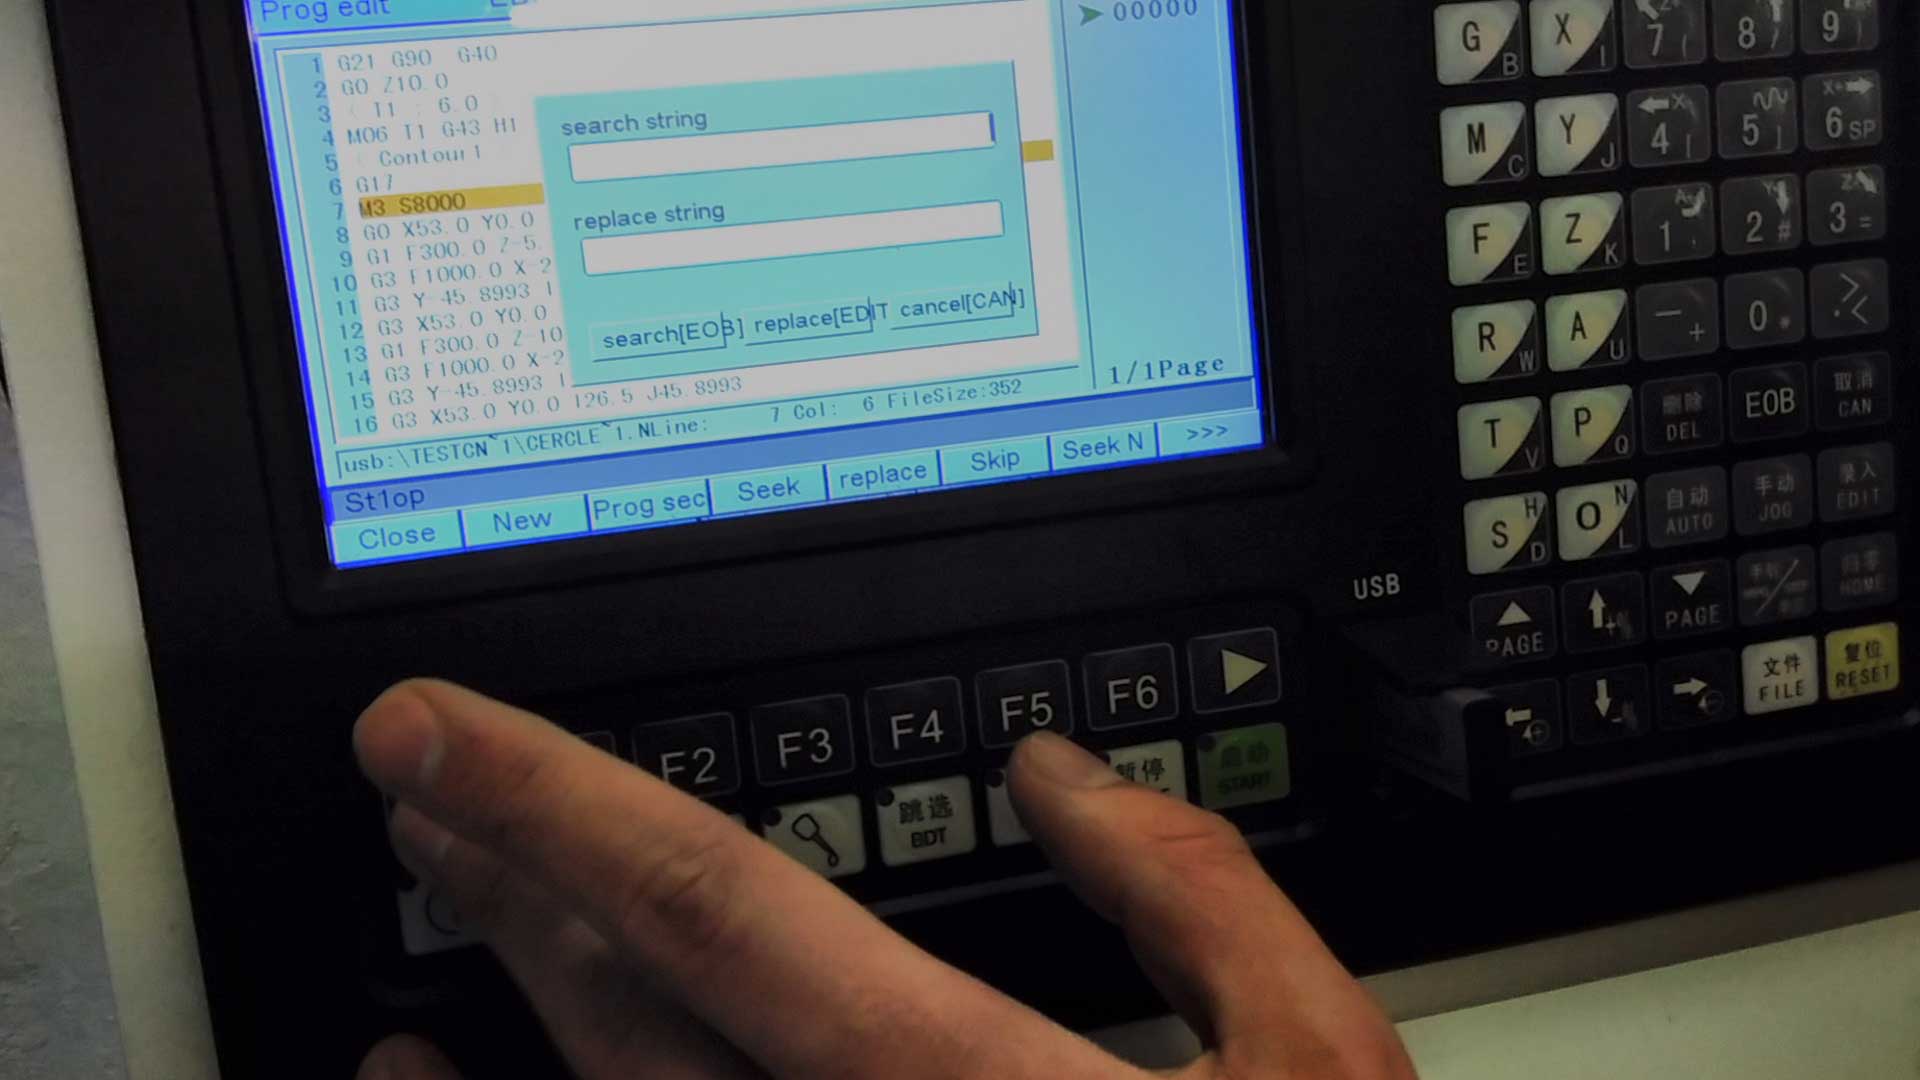
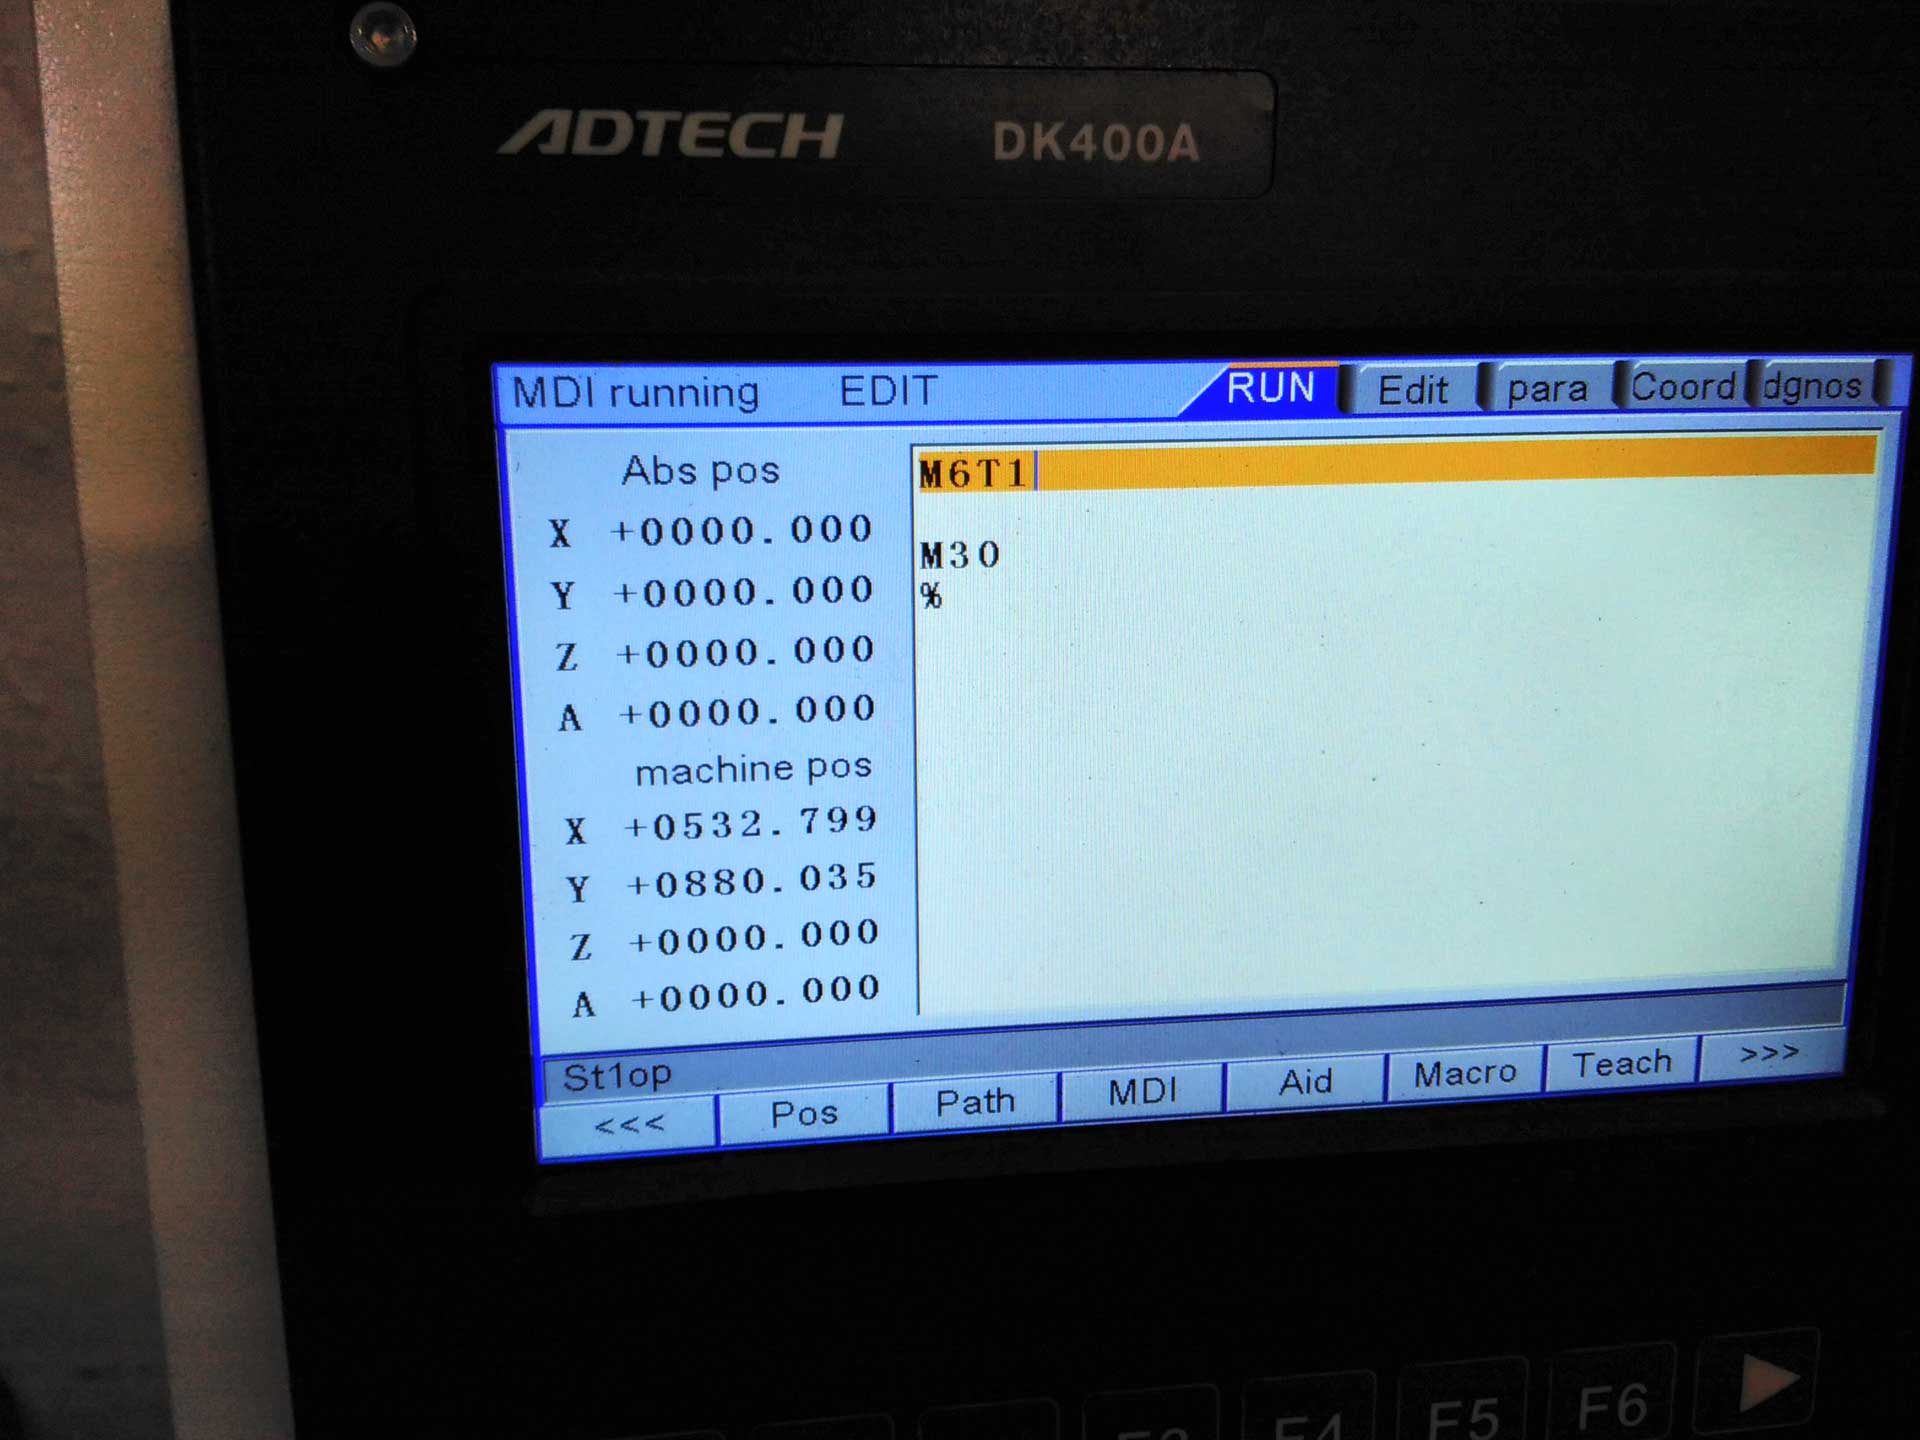
CNC control interface
is an ADTech ADT-DK400A, the full manual in English is below
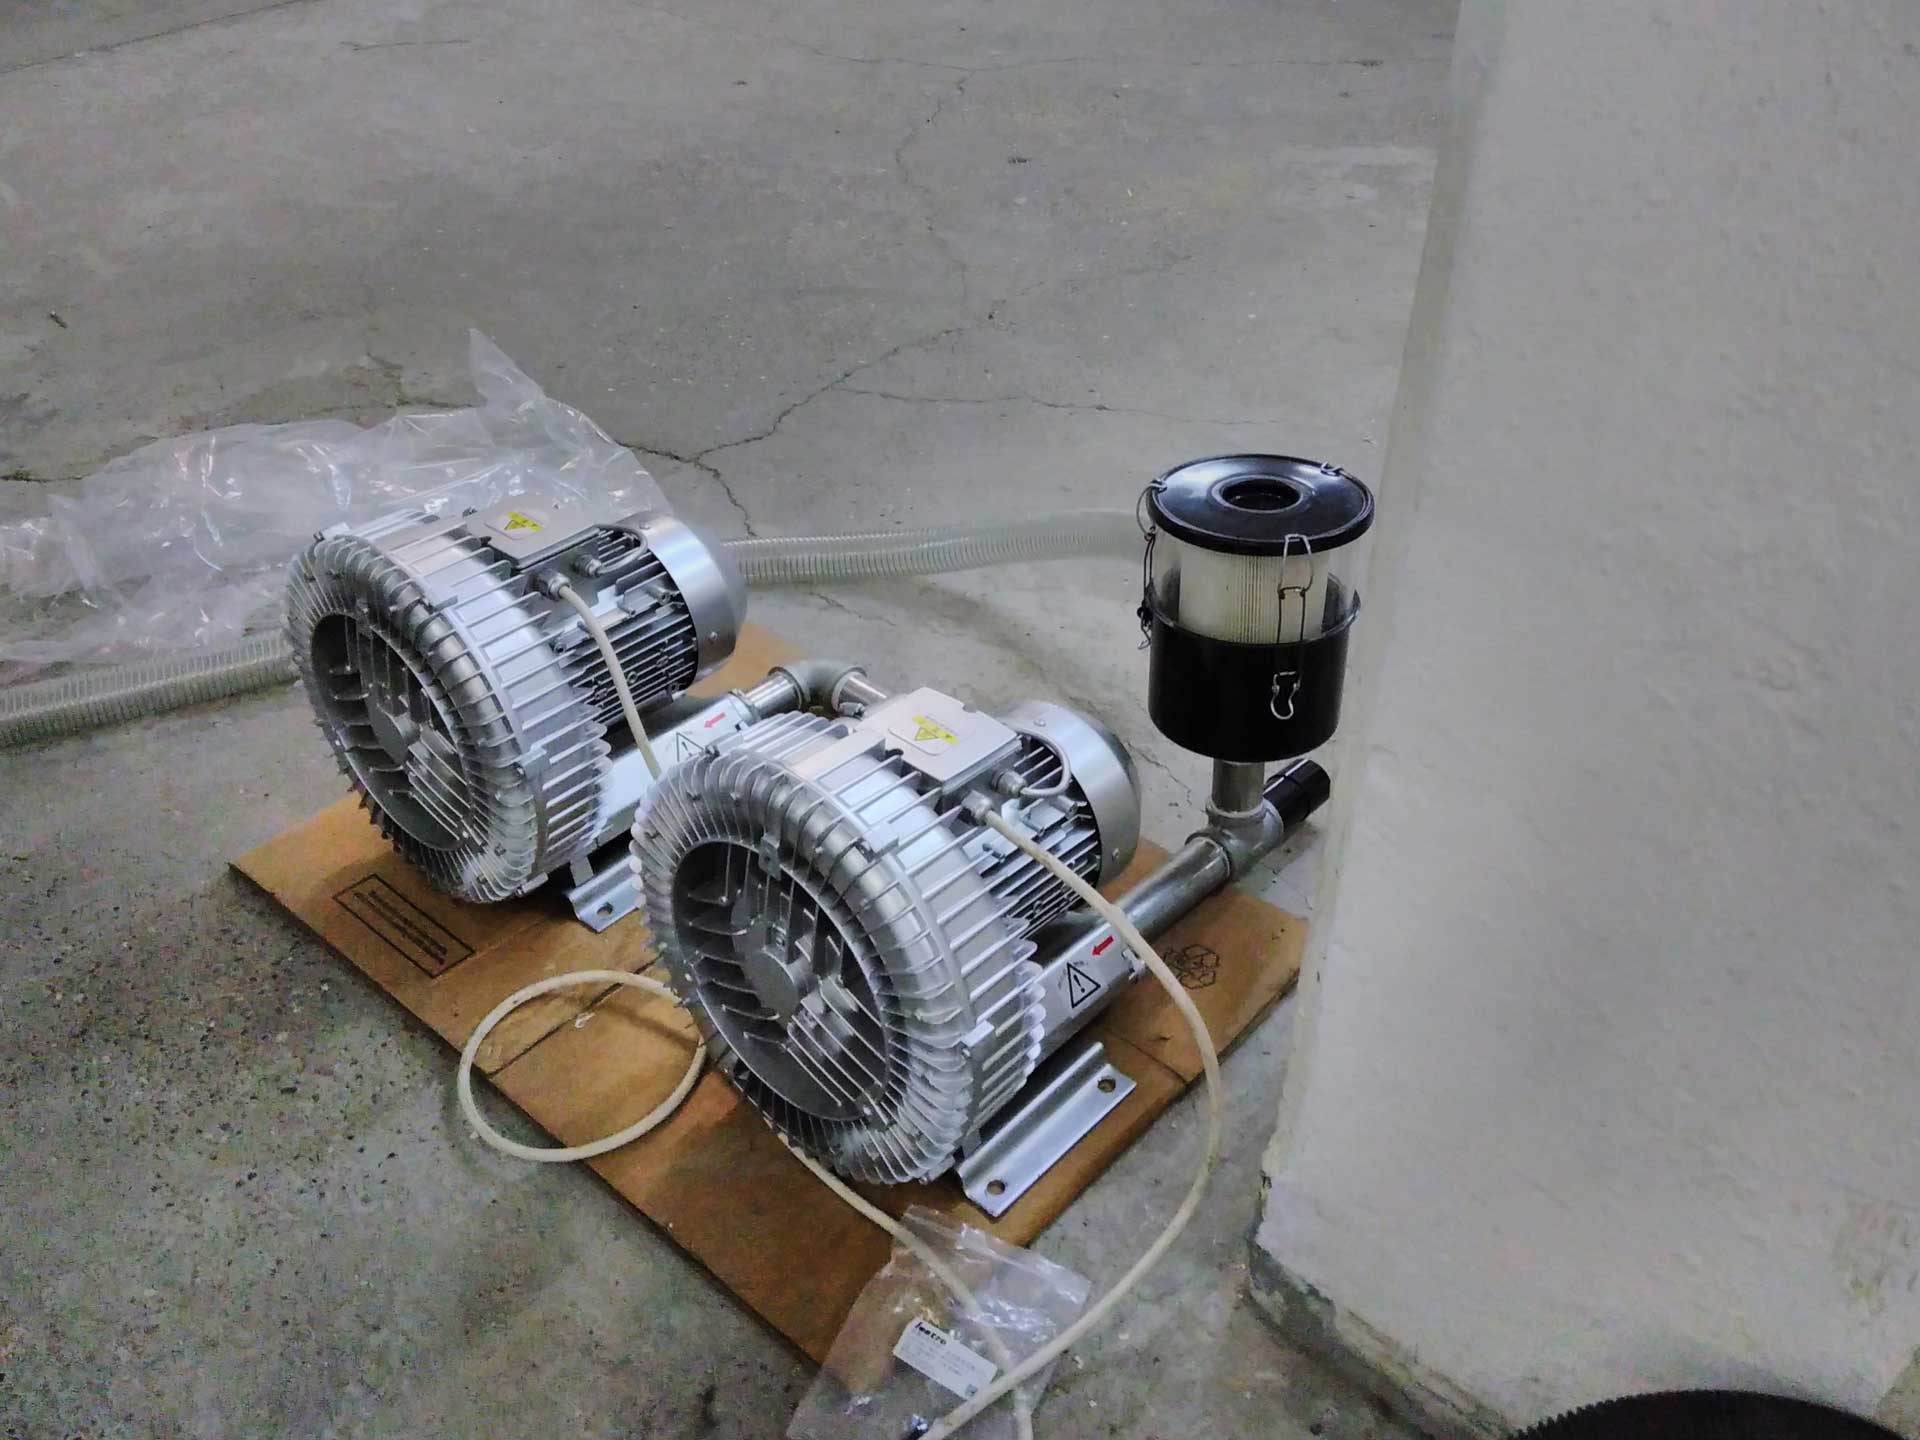
Aspiration system

2 * 120 litre
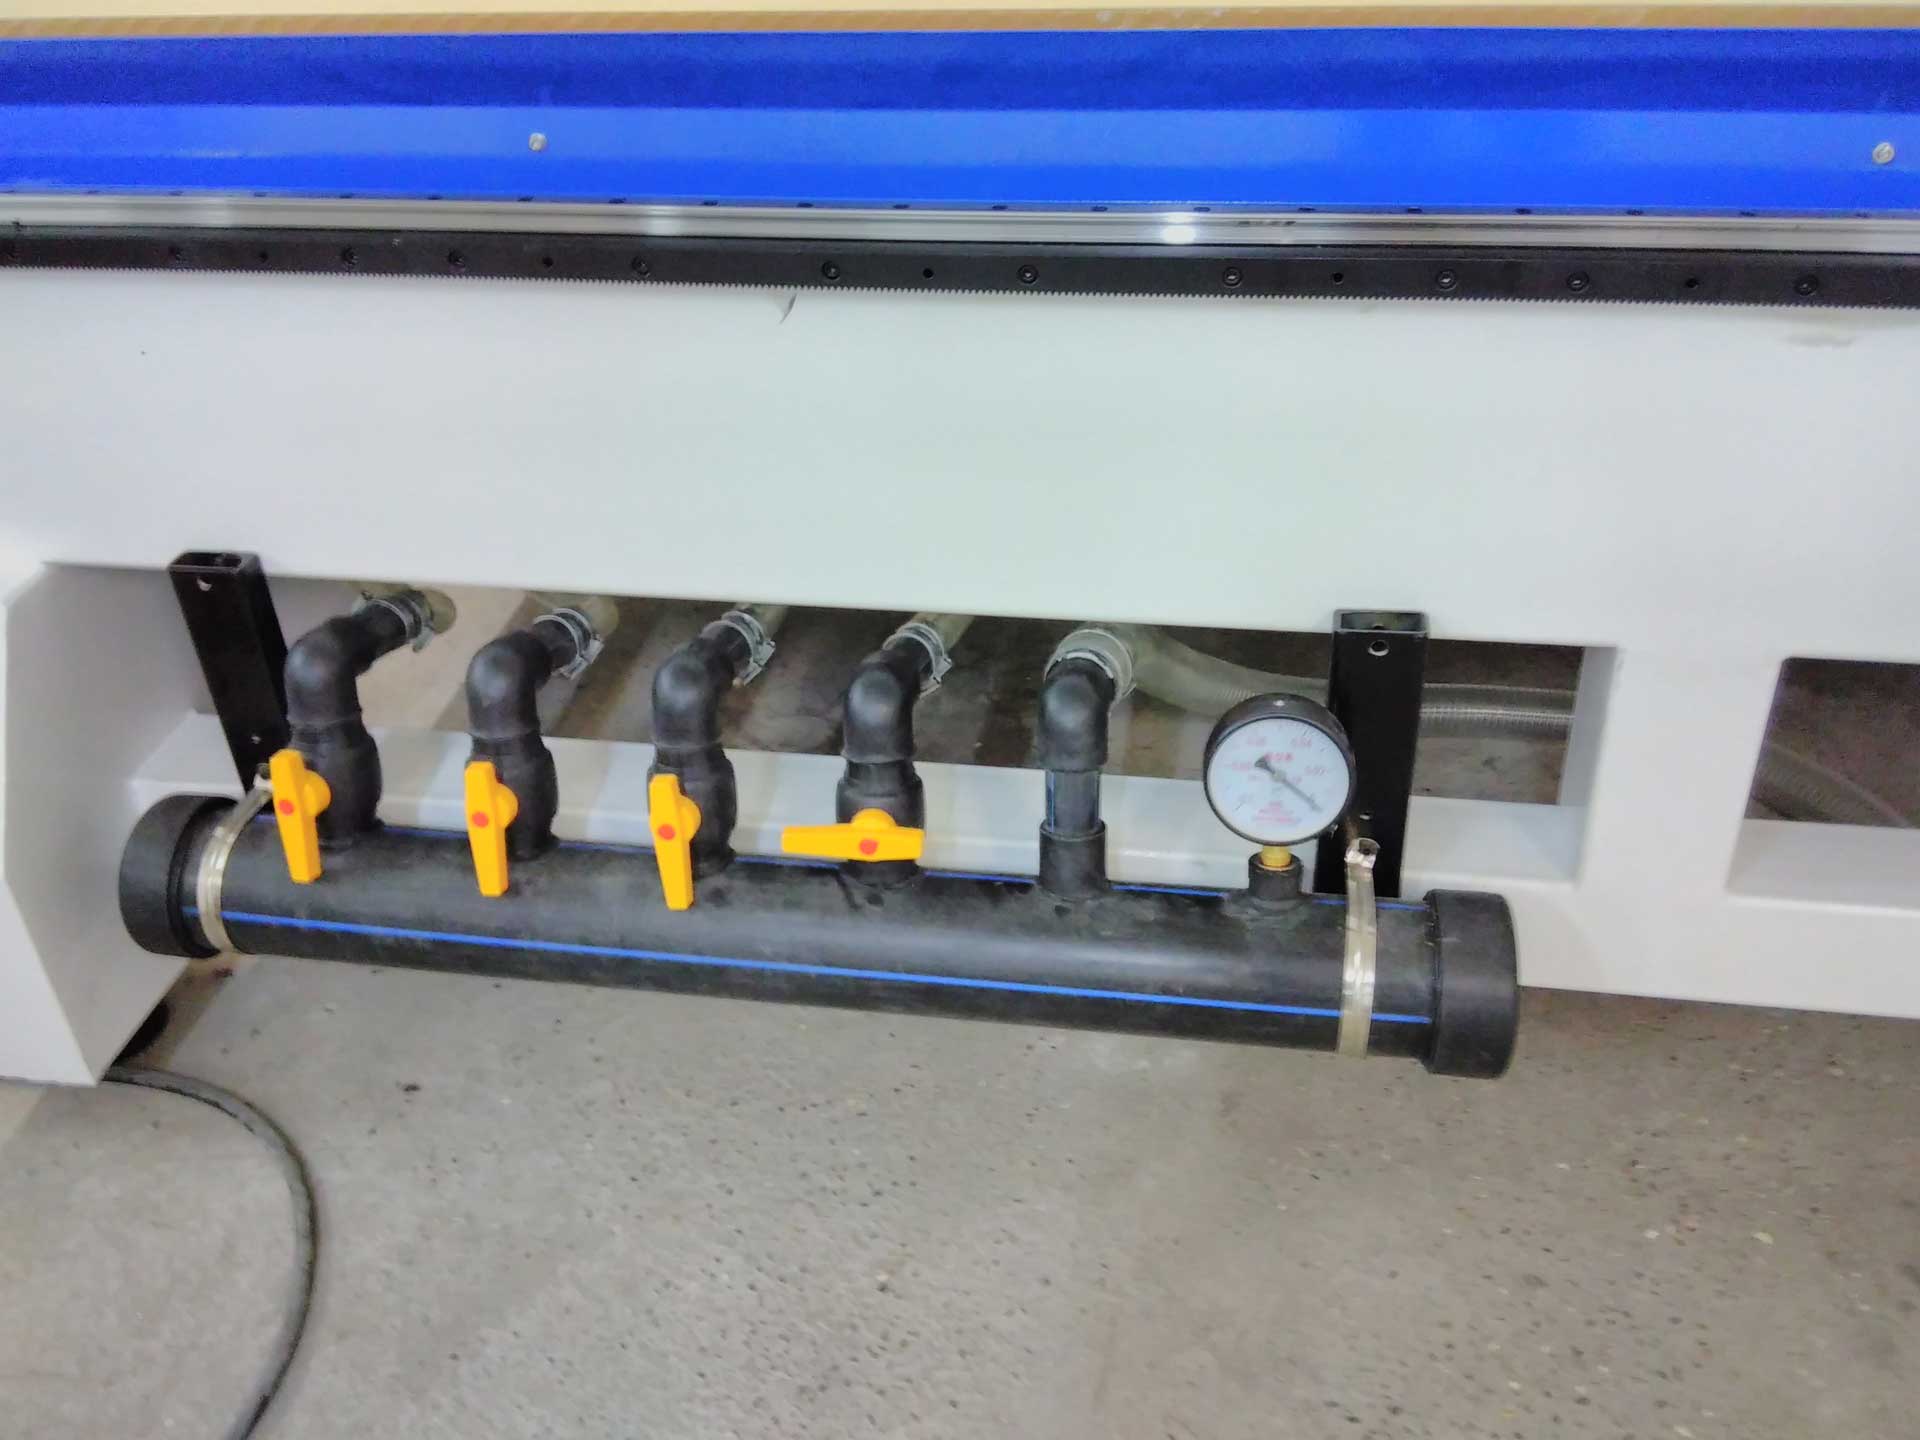
The vacuum unit for the table
Composed of 4 zones.
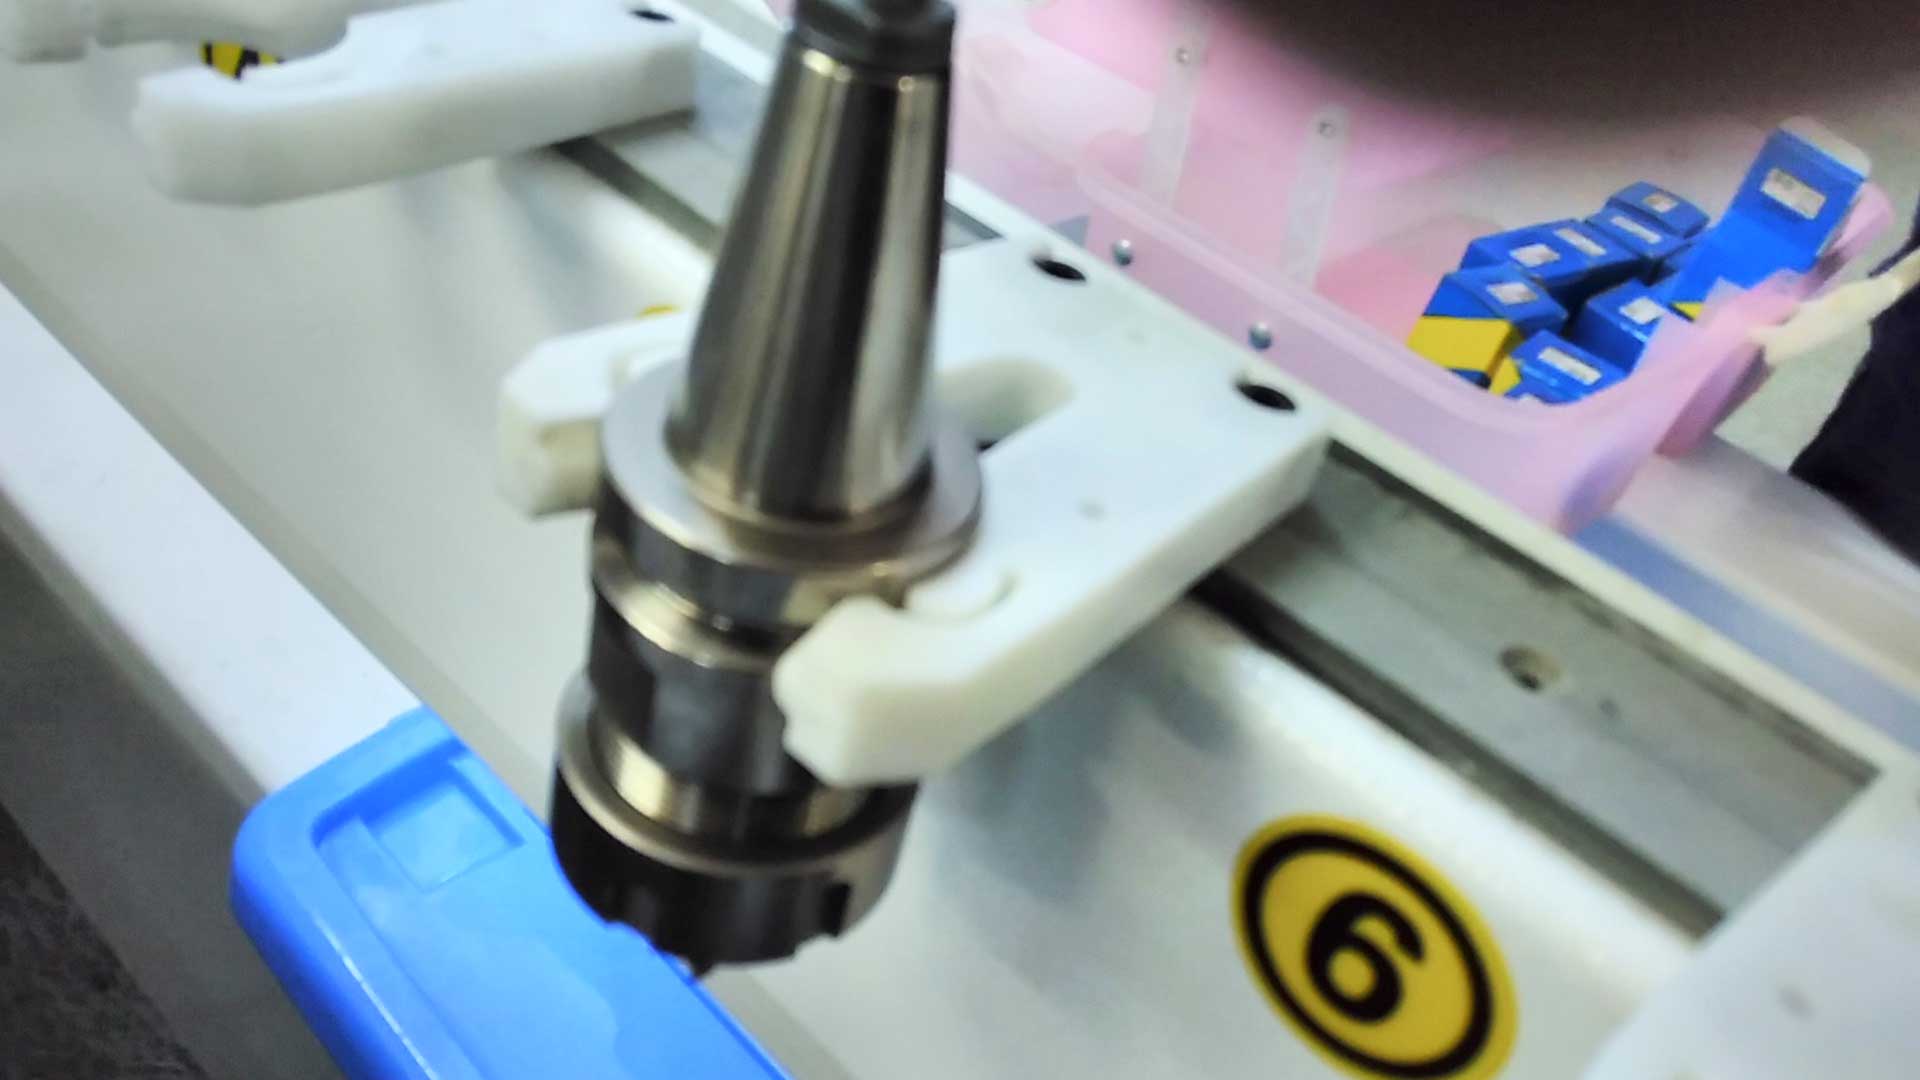
The tool changer holder

Specific g-code, IMPORTANT
You can try those commands with the MDI interface.
M6T1 is the command to switch to the tool n°1
M6T2 is the command to switch to the tool n°2
M06 T2 G43 H2 is the command to switch to the tool n°2 and to take the height compensation of the tool n°2
The output 7 is for the "skirt" connected to the aspiration system hiding the spindle
The output 8 is for the jaw maintaining the tool in the right place. You have to use that command to change the tool manually on the tool changer.
Always do your home position (G54) with the tool #1. The tool compensation is measured with this reference !
Prepare your g-code on Fusion360
After generate your toolpath (more info here or here) into the manufacture module, you have to generate a proper g-code.
Click on this button (post-process).

This menu allows you generate and save the Gcode who will be use by the machine:

The most important thing to change is the Post Configuration config. Select Mach3mill/mach3mill. Name your file (no more than 8 non-specials characters) and click Post.
Your Gcode is generated but you have to change some lines manually. Open your .tap with a text editor:

Delete all the line before "G54"

And copy-paste this header:
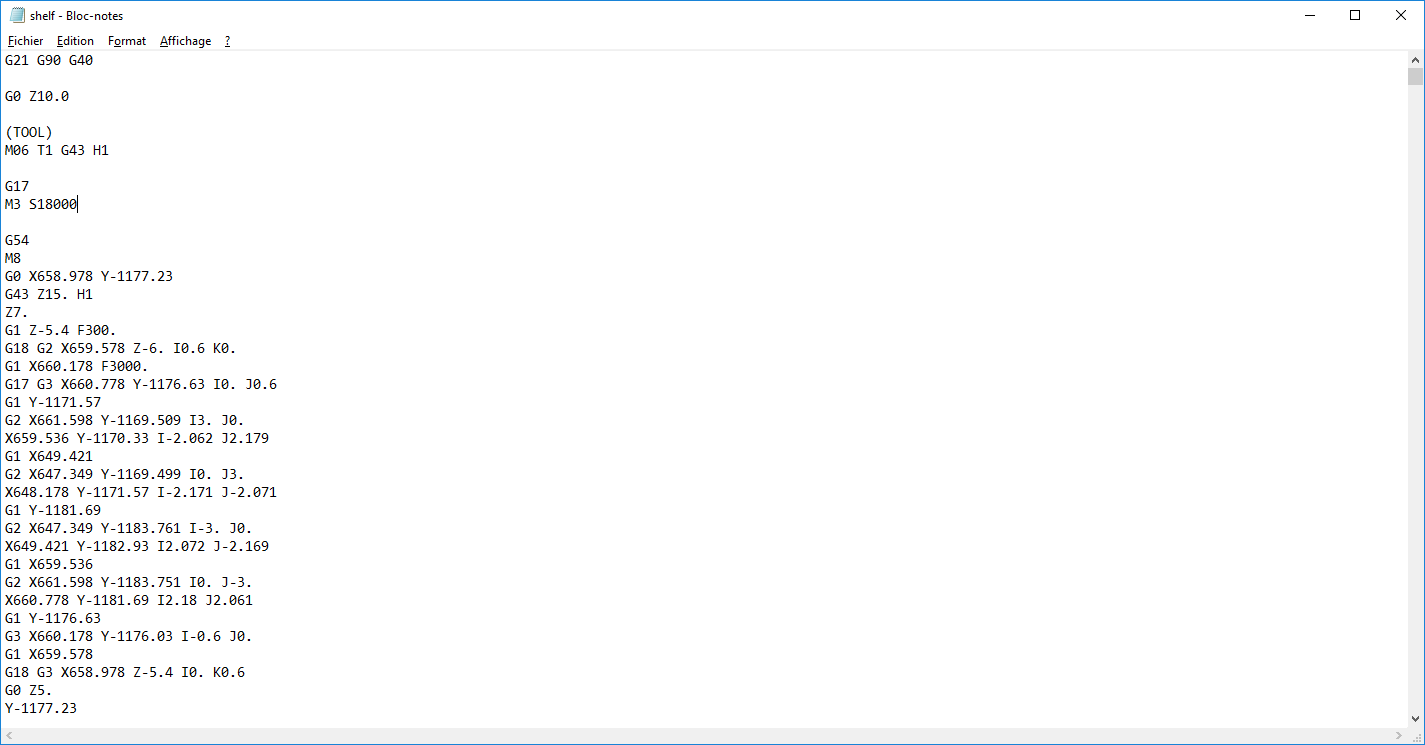
G21 G90 G40
 G0 Z10.0
(You're using Tool 1 so T1 and H1. For tool 2 H2 etc.)
 M06 T1 G43 H1
 G17
(S18000 stands for the speed. If you set it lower or higher don't forget to change it here)
 M3 S18000
Please check that your g-code look like this !!!
Your file is ready to go!
How to mill your file with the ML2512
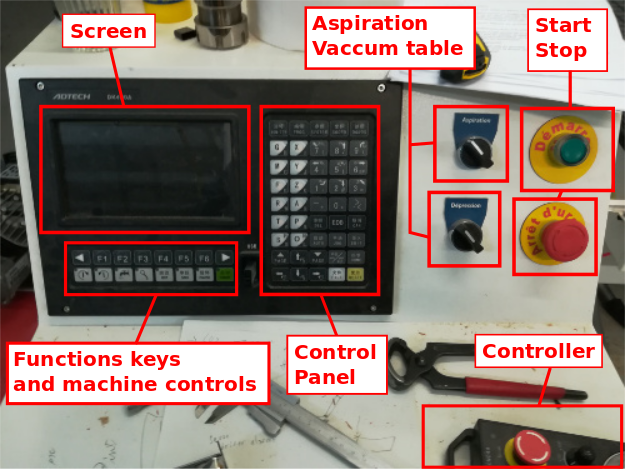
Screen: Display the interface.
Functions keys: Each function key is related to an option displayed above it.
Machine controls: Using to start or stop the spindle, pause the machine or start a job.
Control panel: A lot of keys for a lot of options, most of those are explained below.
Controller: an hand-controller for move the axis or start/stop the machine.
Start/Démarrer: To boot the machine, push this button for few seconds.
Stop/ Arrêt d'urgence: To shutdown the machine or, in case of emergency, stop the machine.
Aspiration: A switch for start or stop the aspiration.
Dépression/Vaccum table: A switch for start or stop the vaccum table.
1. Boot the controller (and the machine) by pushing the green button on it.
2. This screen will appear. It's asking for automatic homing:

For choosing one or another you need to find those buttons:

DEL -> Delete.
EOB -> Confirm, Ok.
CAN -> Cancel.
If you click OEB, Confirm, so it will do an automatic homing.
But it's very slow.
So you can click CAN and move the axis manually.
Click on "JOG" on the control panel:

Now you can use these keys to move the axis:
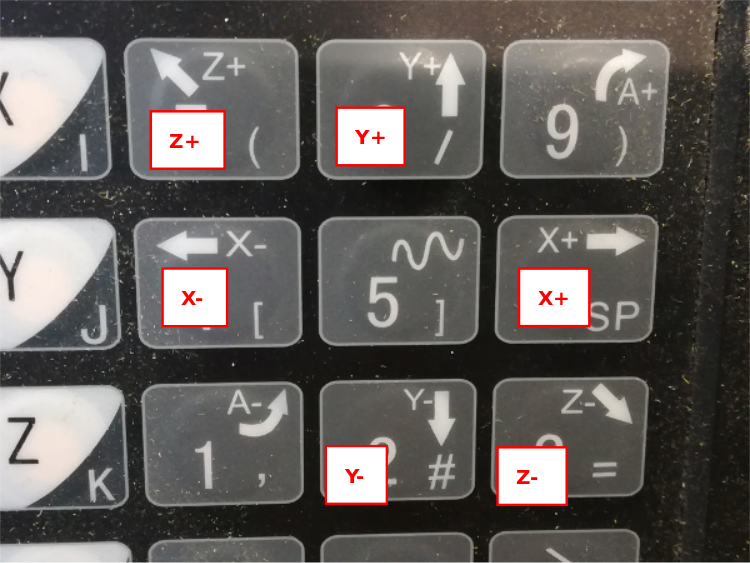
Move the head in the bottom left angle of the machine:


When it's done, click on Home, then Start to automatically homing the machine:


The machine will move a bit and stop. It's done!

Now can put your material on the table. If there's no sacrificial layer, put an 6mm (not 3, not 9, 6.) MDF sheet.
Push the "Depression" button to start the vaccum table and flat your sheet.
If you don't want to use the depression (or if it doesn't work) you can use clamps that you put into the slides:

A good thing to do before doing something else is to check tools compensations, especialy if a lot of peoples use the machine before you.
You have to use the command T-Check. (Further explenation later I don't have the photos)
3. Set the 0 for your cut:
/!\ The machine have an automatic tool changer. Set the origin ALWAYS with tool 1 even if you'll use another tool. /!\
To change tools, you have to enter this G-code in the console (in RUN menu, push F3 button under MDI option):
M6T1 for tool 1,
M6T2 for tool 2, etc.
Use JOG to move the head above your material. For more precision, use the hand controller.
Click on the "MPG/STEP" button to be allowed to use the controller:
Now the button on the controller can be use: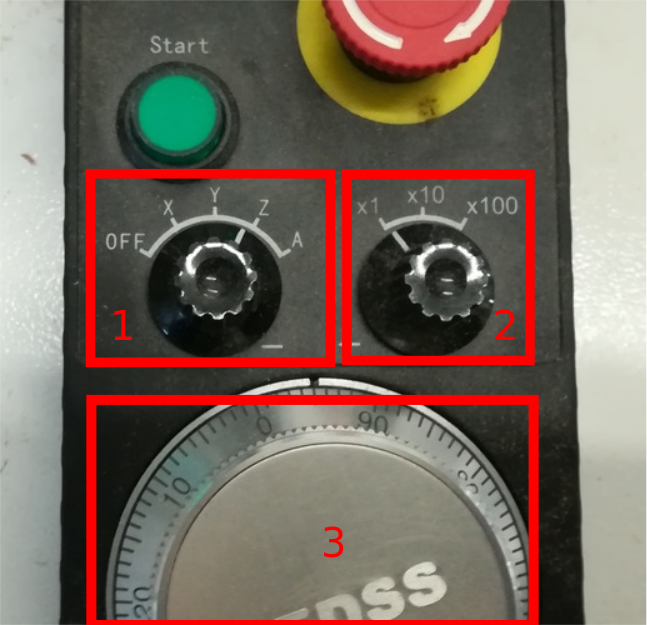
1. Choose which axis you will move.
2. Choose at which steps you'll move the axing.
3. Use this knob to actually move the axis.
Start button is use for starting the job and the stop one for stopping it. If the milling machine refuse to move and makes some "blips" perhaps this button is still pressed.
Use the hand controller to move precisely the axis for your origin. X and Y are pretty easy. For Z axis, move it near your material or the sacrificial layer (depending which Box Point you've set in Fusion360).
When you're touching the material roll the head with you're hand: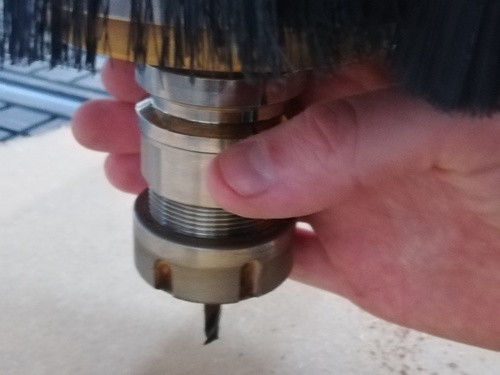
When you're starting to mill a bit the material stop it.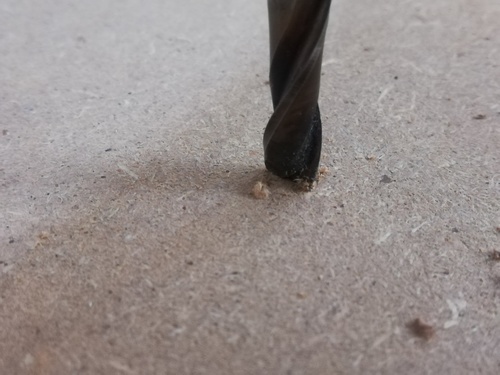
Now turn the hand controller off and push on "COORD" on the controller. Each of these buttons are related to one of these tab: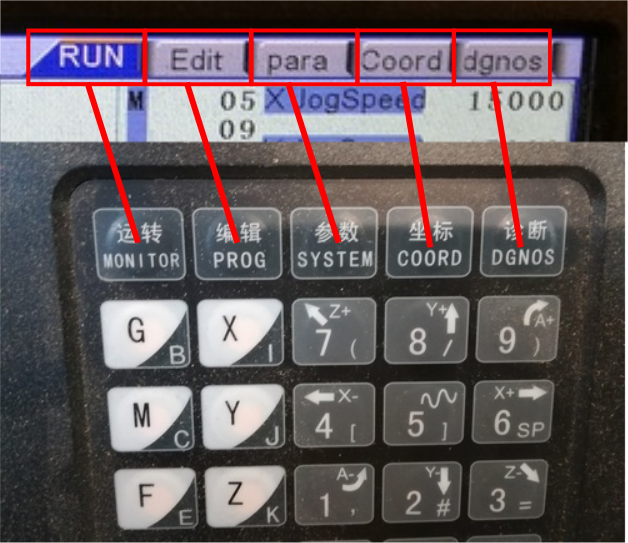
When you're in the COORD menu, just press EOB, a message will appear and push EOB once again.
The origin for your job is set, use the JOG command to move the end mill away (if you reboot the CNC, these values are saved).
4. Loading your file and starting your job:
To load your file, push PROG button.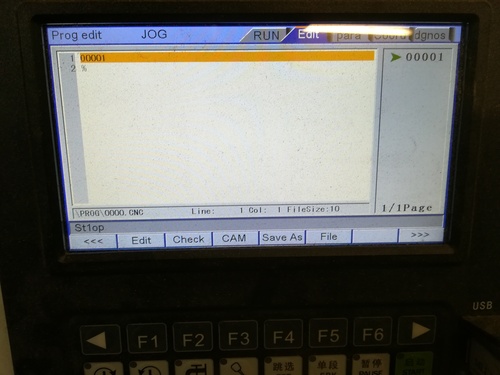
With the "F" keys, select "File". You're using an USB key so move the cursor with arrows keys and select "Data traveller".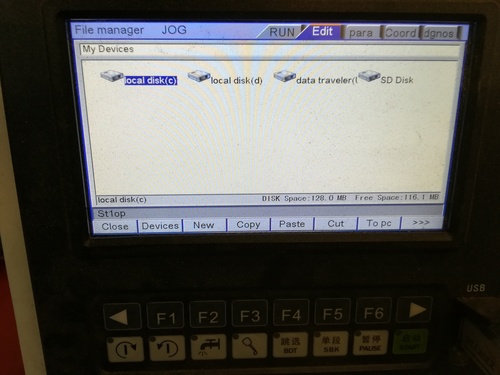
Select your file, confirm with EOB, push Auto key and START! 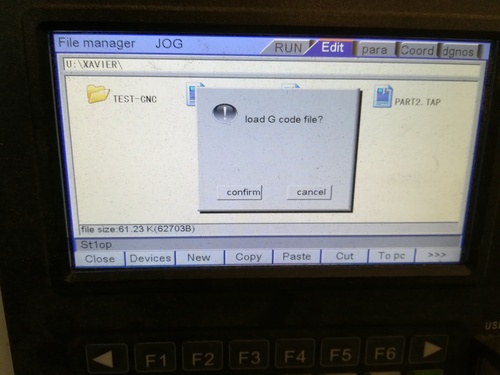
At the end of your mill, stop the spindle by pushing this button: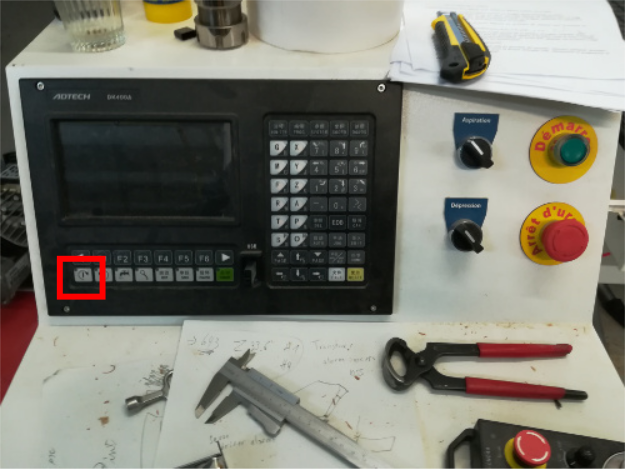
Before leaving, please change to Tool 1 if you were using another tool:
In RUN tab -> MDI function -> Edit mode
Enter M6T1
Press EOB.
Remerciements
Cet équipement a été acquis dans le cadre du programme FabLabs Solidaire de la Fondation Orange et Orange Belgium avec comme partenaires iMAL et Atelier Groot Eiland.

Downloads
Gallery
Info
Difficulty: 4/5
Last updated: September 2022