Form1+:Some Models
Vers 1.3 In progress
NB : for better knowledges on How to Make see Form1+First Print in Resources
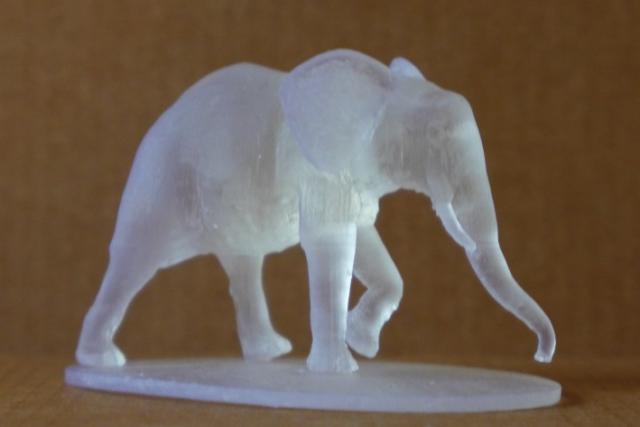
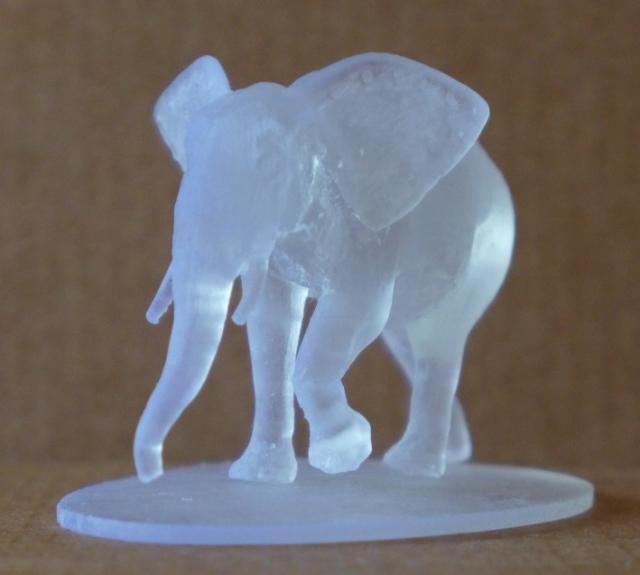
1) The King of Congo ( Zaïre )
Max height = 5 cm
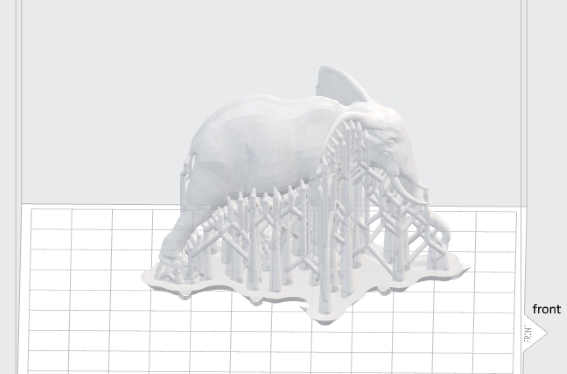
Realized with Preform 2.9.1
Resine: Clear2; Layer: 0,1mm; Density:1,3;Point Size:0,9; Density for inclinations ( inclinaisons ):3
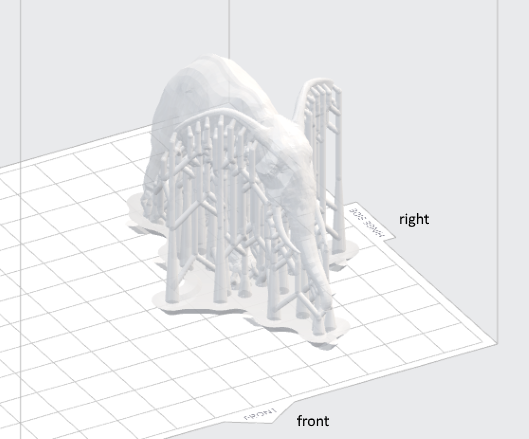
Ajout/Displaced supports manually. The pedestal was glued later.
Difficulty: Orientation of the model. It is oriented manually on the right in Preform with the trunk ( trompe )
to the front and the large ears parallel with the front. These 3 elements and the 2 fine tusks
( défenses ) are very well supported.
Ears are in some places very thin.
Due to the little surfaces of feet, there is no inclination.
Be carefull to remove supports under trunk , mounth and tusks. Clear Resine 2 is also brittle.
Here are 2 photos on to the plateform:
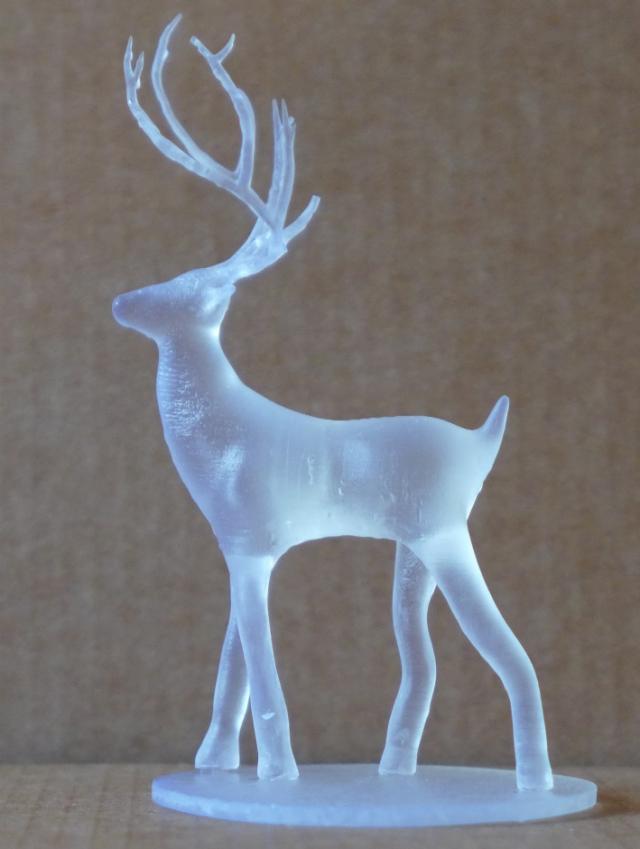
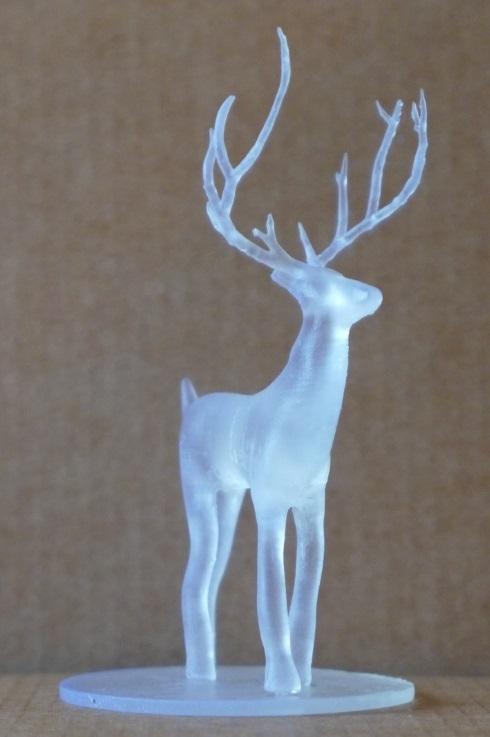
2) The King of our forests
Max height = 9 cm
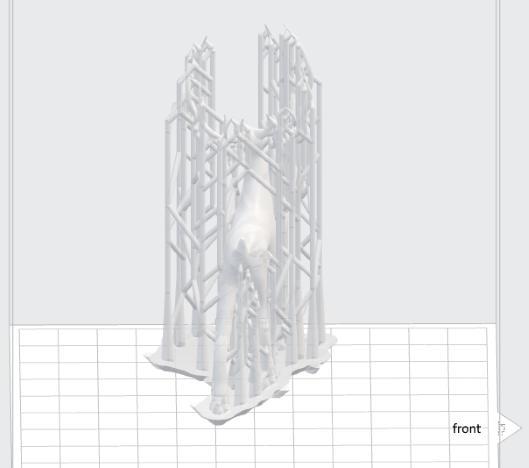
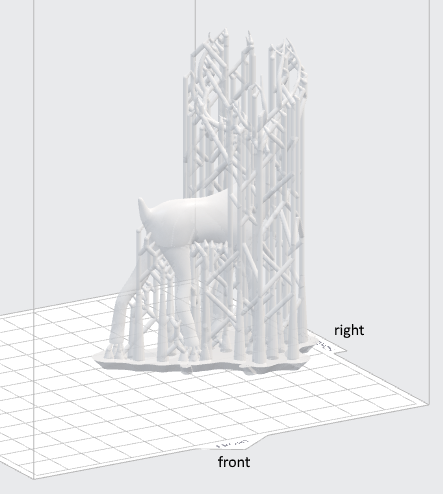
Realized with Preform 2.10.2
Resine: Clear2; Layer: 0,1mm; Density:1; Density for inclinations: 3; Point Size: 0,6mm
Ajout/Displacement manually of supports. The pedestal was glued later.
Difficulty: Orientation of the model manually. The very fine ( 0,5 mm at the end ) structure of wood ( bois ) implies to
orient the deer parallel to the front and the wood to the right of the soft and to assure very good supports.
No incination due to the little surfaces of feet.
Be patient and carefull to remove supports.
Here 2 photos on to the plateform:
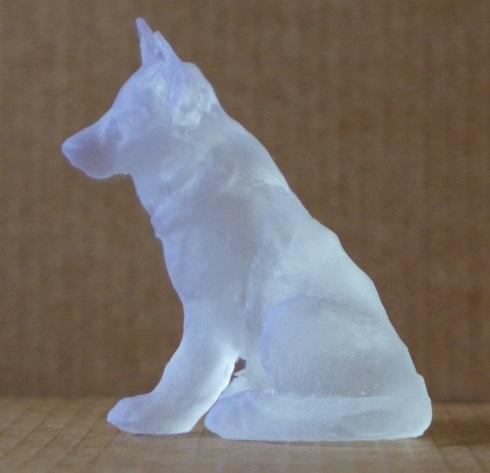
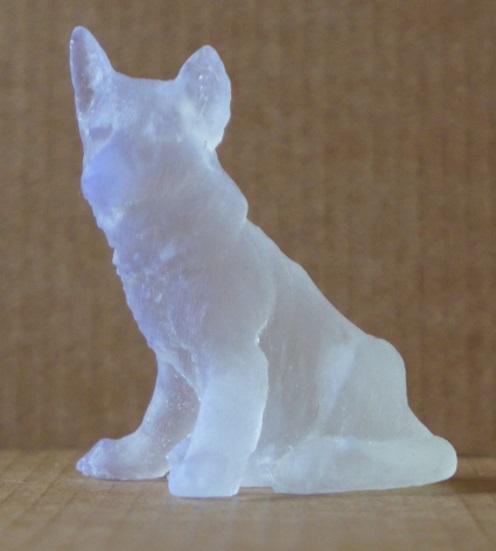
3) A young wel-known dog from Germany
Height = 5,9 cm
Realiezd with Preform 2.9.1
Resine Clear 2
Parameters : Layer: 0,1 mm; Density: 1,3; Density for inclinations: 3;
Point Size: 0,7 at the right and 1,2 at the left beneath the back.
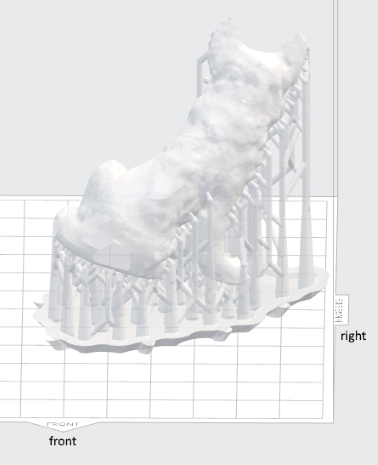
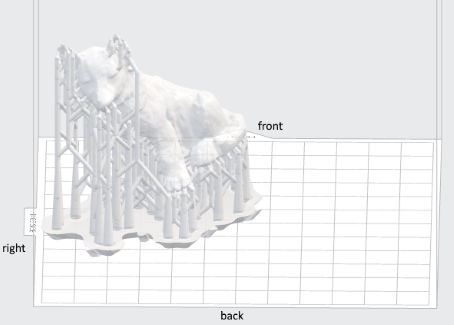
Difficulty : As the base is large you must incline the model. Here 20° to the right on the Plateform in the soft.
Manually positionned. The fine ears are set parallel to the front.
Here 2 pictures in the soft :
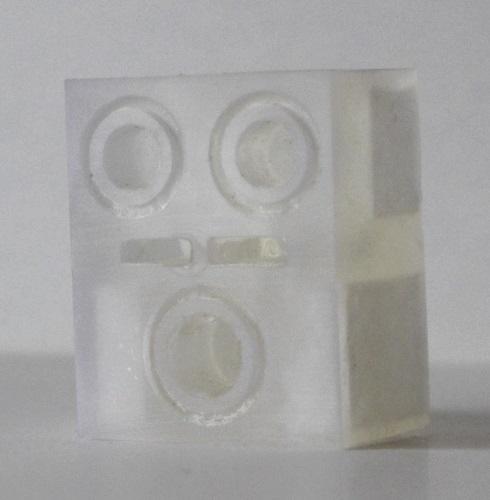
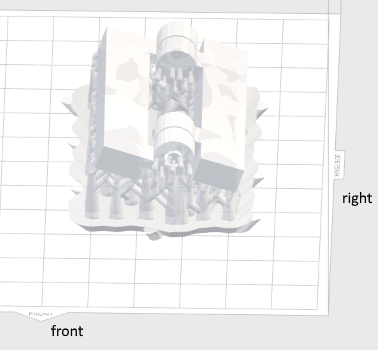
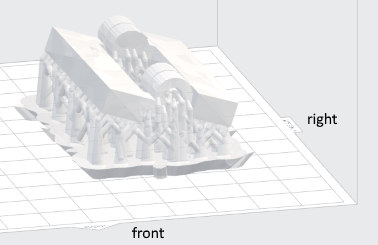
4) LabonChip : little transportable laboratory to make chemical or biological test on a site.
Here it is the main body.
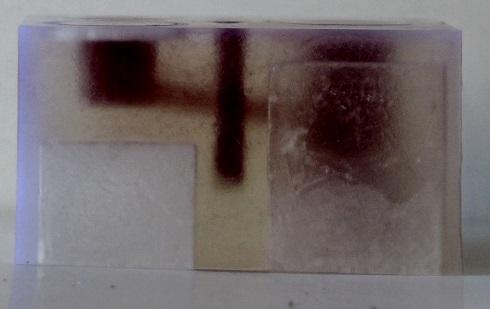
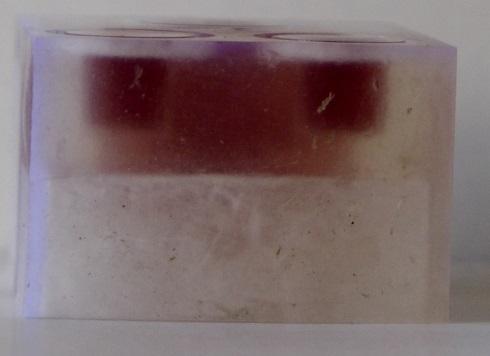
You have here a photo of the top: 2 little tanks above and a big one. In the middle, places to insert 2 electric valves.
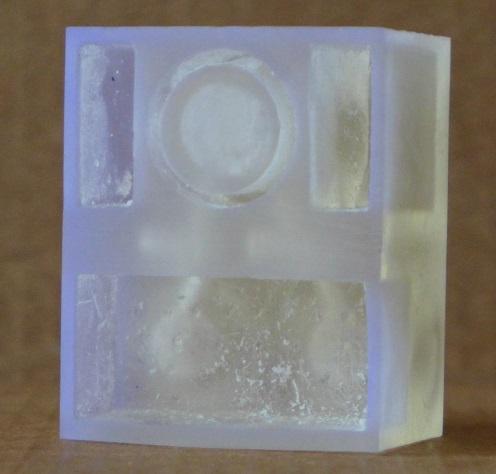
Here you have a photo of the back: You see the groove around the big tank to insert an electric warmer
Dimensions : 4 x 3,3 x 2,1 cm
Constitution and use:
It has 2 little tanks and a big one. At the departure, one little tank is filled with a reactif.
The other little tank is filled with a sampling on the site.
At the middle are the places to insert 2 electric valves normally closed.
Between each little tank is a canal with a diameter of 3 mm to the big one.
Normally each tank must have a cap fixed in the groove around it ( you see it on the top bellow ).
On the site, with the 2 little tanks filled, the valves are opened not necesserarily at the same time ( chemists
know the reason ) to mix the 2 liquids in the big one.
Around the big tank is a groove to insert an electric warmer.
By the cap above the big tank, a mixer can be activated as well as a sensor inserted.
So, directly on the site, it is possible to know the result.
Manufacturing : Preform 2.12.2
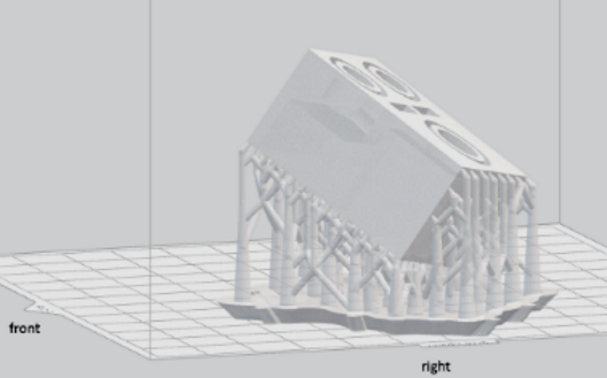
Difficulty: Due to the groove beneath the part for the electric warmer, it is difficult to position the part manually
to get a printable model. Always see if the model is printable indicated right bellow in Preform after
slicing.
The Automatique positionning of this Preform version has well done.
Layer: 0,1mm; Density:1,2; Density for inclinasons:1,5 ; Point Size: 0,6mm
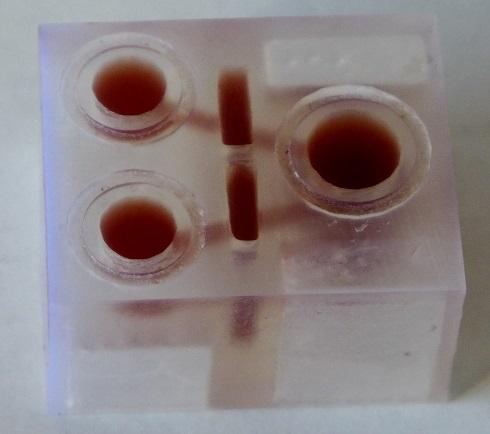
Here are 3 photos with the tanks and canals filled with a red liquid to see the very well done cavities.
The top:
Lateral with a little tank on the left and you see also a canal. The form of the big tank is deformed
by the plastic light diffraction.
A side with 2 little tanks and the big one further.
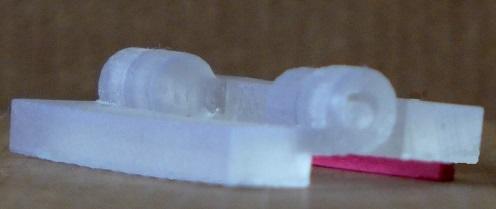
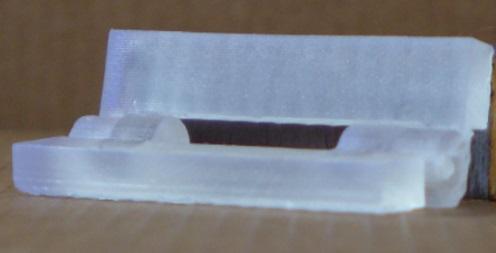
5) Double Hinges ( charnières )
Dimension of the middle rotative rod seen at the right in the hinge : diameter = 3 mm.
Problem : Draw this part with a mechanical clearance everywhere = 0,5 mm and see if after printing
and removing support it rotate. It is OK.
Realized with Preform 2.9.1
Resine: Clear 2
Parameters: Layer: 0,1 ; Density: 1,3; Density for inclinations: 3
Point Size: 0,8 at the right and 1 at the left
Positionned manually: inclination: 18° to the right in the soft.
Manually change, reposition and add supports.
Another view after manufacturing :
You find here the positionning :
The same was done in grey 2 resine.
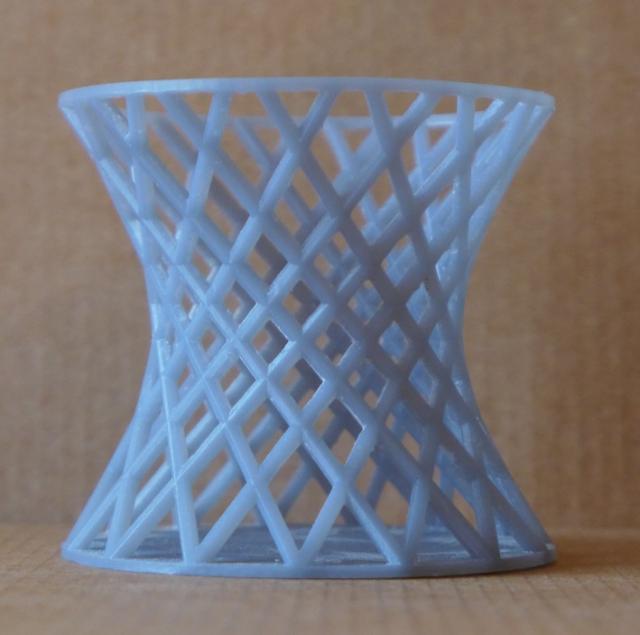
6) Twisted Cage to set pencils for exemple
Height = 7 cm
Realiezd with Preform 2.10.3
Resine Grey 2 which asks for more irradiance ( W/cm² ) from the laser.
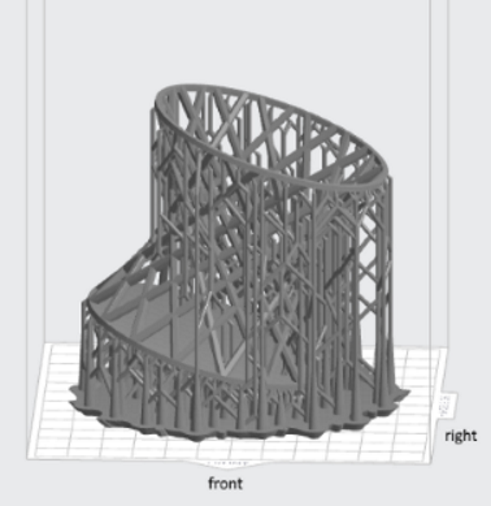
Difficulties : the large bottom requires inclination.
The form asks for internal supports
Parameters : Layer: 0,1 mm; Density: 1; Density for inclinations: 1,8 which sets supports
Point Size: 0,7
Inclination : 18° to the right in the soft.
Manual positionning and repositionning supports.
Here one image of the part in the soft:
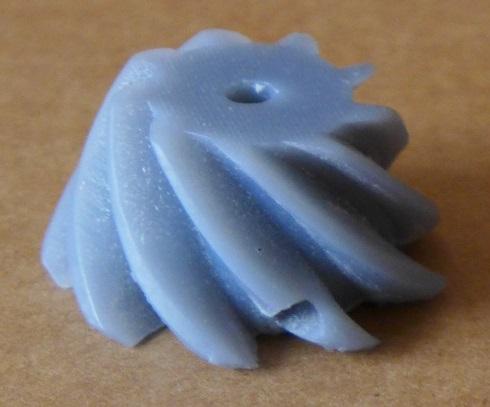
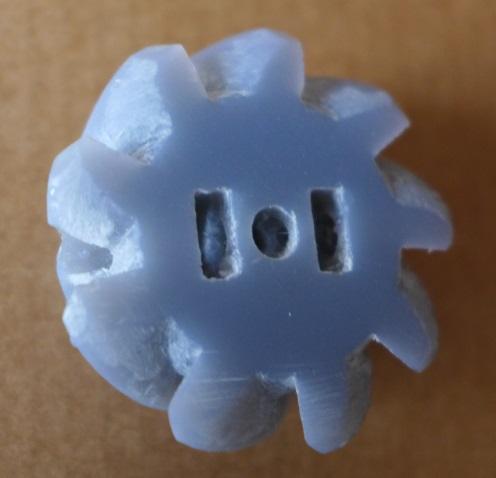
7) Well shaped cog-wheel ( engrenage ) from a car differential system
You see the internal cavities in the back
Realized with Preform 2.10.2
Resine: Grey 2
Parameters: Layer: 0,1 ; Density: 1,25; Density for inclinations: 2.5
Point Size: 0,7 at the right and 1 at the left.
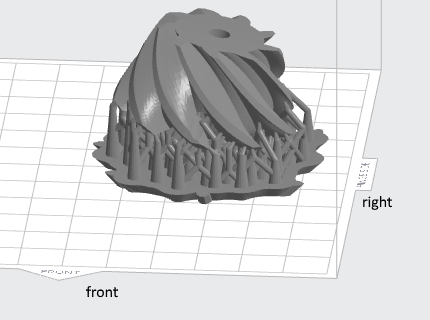
Positionned manually: inclination: 15° to the right in the soft.
No internal supports
Manually change, reposition and add supports.
Position in the soft:
Info
Date: December 2017
Last updated: January 2018
