4 days in fab-lab
4 days in fab-lab
One te first day, I learnde how to use the machines. The most fascinating was the laser cutting machine sa that is the one I worked with.
After learning few to use it, I started on my bike projects.
I chose a bike that I modelised as a "prototype". The goal was to try differents macine to get a 3D result. For me it wasn't hard to modelise.
The Other Days;
Here I used some of the explanations writen by my friend Aurore;
The 3D printer.
The printer works by adding layers of PLA plastic over and over, when the platform slowly goes down. After 2 hours, the model wasfinally ready !
There's another plastic called ABS that caan be used, but it is a bit harder to work with, the macine is often clogged.
The difference doesn't sound so big, but it is. It's basically just about ow much the platform will go down at each layer. Optimal is about 0.1mm, when normal is around 0.25mm, which makes it more tan half the resolution already.
3D Printing: Bike.
I designed a new concept of bike with an nuclear reactor inside it.
I drew the bike then I modelized it on Maya Autodesk.
Afther that I tried to print it.
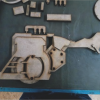
Sadly, because og te back of the bike, the quality was realy bad as you can see.
So I started to vectorize the bike on Illustrator to use the laser cutter;
Laser Cutting: Glued Bike.
The laser cutting machine is my favorite. It's easy to use, and the results are just perfects.
It's simple : Import the file in.DXF into te progrm, and start te cutting part. The machine is also really big.
Here's the interface. It's the software 123Maker by Autodesk:
Before
the bike I tried to make the reactor but I was nnot satisfied with the
results because I made a lot of errors on my vectors. See it by
yourself:
I have somes pictures of the process but the protective glass of the machine madee everyting slightly blurry, and the pictures aren't clear.
Afther I assembled the different parts together to see the results. It was like expected.
So I glued it together. Watch the results, I definitely love it !
My conclusion is that you have to try it for yourself if you want to see the full potential of tese machines !
Info
Date: October 2016
Last updated: March 2017


