Exemples with Cura
Vers 1.3 of Oct the 4th of 2017
1. Professor Monkey
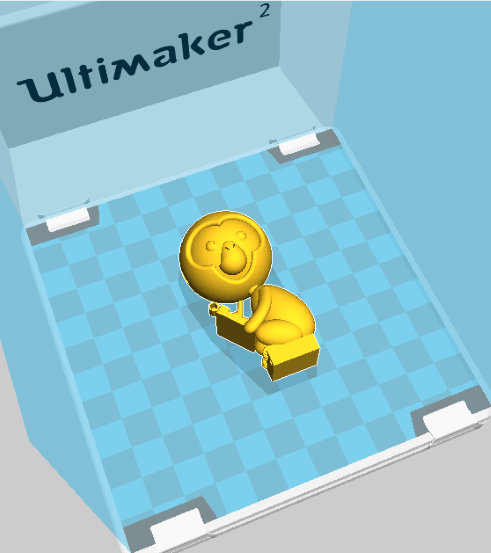
Find here a positionning image of a little Professor Monkey on the Ultimaker 2Go.
Dimensions XYZ = WidthDepthHeight (Largeur,Profondeur,Hauteur ) = ~32X58X29 mm.
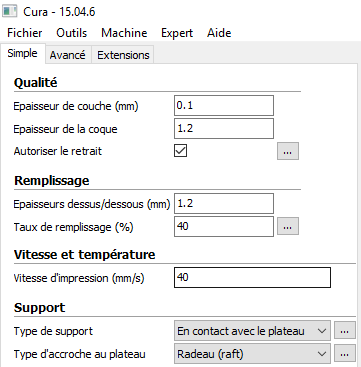
And here some parameters to print it in PLA.
Printing temperature = 210°C
Travel speed = 40 mm/s ( to allow a good positionning ).
Overlap = 30% ( for Cura 2.4.0 set Skin Overlap = 30% ). To allow a good adhesion for tiny sub-parts
of the main part , good shell and top and bottom faces, adhesion with the infill.
Repair model : Options A and C.
Brim ( jupe ) has no importance as you use a Raft.
Lines supports with a good density ( for well-done part builing ) because they will be easier to remove.
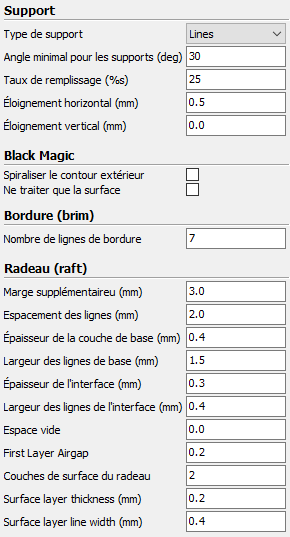
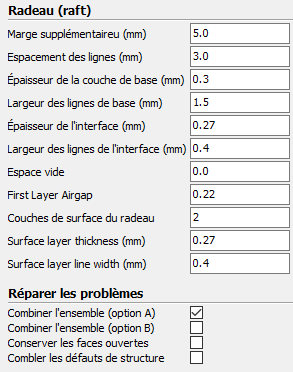
Raft : with Cura 2.4.0 you must add some parameters.
Raft Middle Spacing ( espacement des lignes de la couche intermédiaire ( interface )) = 0,6 mm.
Raft Surface Spacing = 0,4 to get a homogenous surface layer to build the part above.
NB: A Raft consists in tree types of layers : Base ( must adhere to the plateform ), Middle ( interface ) , Surface.
Each type has 3 parameters : Height, Width ( épaisseur )of the ligne ( support in contact with the preceding layer ),
Space ( espacement ) between lignes.
Raft parameters can change with the material, the base of the part , the nature and texture of the upper face
of the plateform.
The Raft peels off from ( se décolle de ) the plateform.
Be patient and delicate to remove supports.
2. A Rose
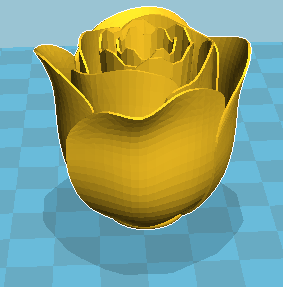
Made with the Mendel 90 Printer ( Prusa i3 ) in red ABS Dimensions : 45 X 46 X 43 mm
Use of Cura 15.04.6
Difficulty : thinness petals
Here is the part view printed so :
Parameters : layer height = 0,2 mm
Shell thickness = 0,8mm
Top and bottom thickness = 1,2mm
Infill Density = 50 %
Infill type = Grid
Printing and travel Speed = 40 mm/s
Extrusion t° = 235°C
Plateform t° = 99°C
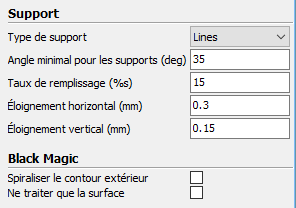
Support on the plateform : Angle = 30°; Support Density ( Taux de remplissage ) = 25 %;
Horiz. Displacement ( Eloign. horiz ) = 0,5 mm.
Use of Raft
Here are the values for Raft and Repair Option :
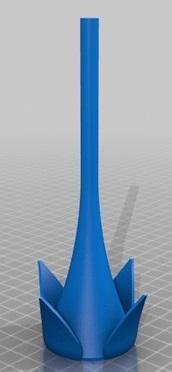
B Stalk ( Tige ) also in ABS
Dimensions : Base : 23,6 X 23,6 mm is adapted to the base of the rose.
Height 53,2 mm.
Printed with stalk above.
The same paramerters as the rose.
Here a view :
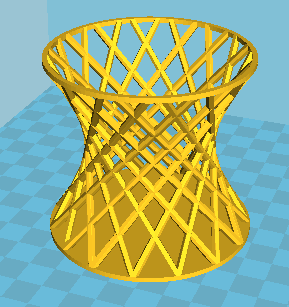
3.Twisted Gage realized in ABS
Difficulty : the branches are inclined according to XYZ of +/- 30°
No infill in the branches.
Realized with Cura 15.04.6
Dimentions : WDH = 75,6 X 75,6 X 69,3 mm
Parameters : layer height = 0,2 mm
Shell thickness = 2,4mm
Top and bottom thickness = 2,4mm
Infill Density = 50 %
Infill type : Grid
Printing and= 40 mm/s
Travel Speed = 75 mm/s
Extrusion t° = 235°C
Plateform t° = 99°C
Here are the values for Supports :
Brim : 5
Raft : the same as for the Rose
and Repair Option : A
4. Hollow a plain solid: ex: a cat realized in PLA
Sinds Cura 2.3.1 you can specify top and bottom layers separately in lines.
To print the cat bellow you specify infill = 0; top layers = 0 and bottom layers = 8 lines ( six is enough ).
It is better to use a Raft.
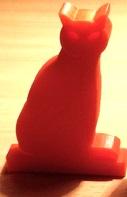
Here is an image of the original almost full filled cat ( there are holes for the eyes ) :
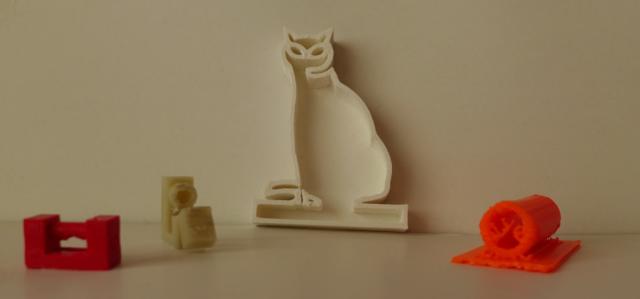
Here you find an image of the hollowed cat .
5. Bridges ( pont ) between lateral supports : the bridge has no supports. Above a certain length it tends to collapse
( s'effondrer ).
You find in the image above on the left in red a try to make a bridge with these specifications : it is a full filled
( plein ) cylinder long of 10 mm and with a diameter of 3,8 mm.
The difficulty is the round shape ( forme circulaire ); especially to print the bottom.
A flat bottom coming from a rectangular section is easier to print.
You see the result. The bottom is not well done.
It is printed with Cura 15.04.6 on an Ultimaker 2Go in PLA with the following parameters :
Layer : 50 um.
shell perimeter : 4 lines of 0, 4 mm = 1,6 mm.
Top/Bottom : 1,6 mm : this setting allows better infill inside the structure than with 1,2 mm.
Infill : 80 ; overlap : 15 %.
Speeds: printing and travelling : 50 mm/s.
Brim : 6 lines.
Minimale fan ( ventilateur ) speed : 80 % of the max.
In comparison a bridge with the same specifications but shorter ( 5mm ) is better done but is also a little
cavernous ( creu ) at the bottom.
6. Pipe ( tuyau ) where there are faces externally and internally not supported. It is printed on a raft.
The purpose is to get well-done internally and externally pipe.
In the image above, on the right is a pipe made with Cura 15.04.6 on the Mendel 90 ( ABS )
Here are the specifications of this pipe : External diameter : 14 mm
Internal diameter : 10 mm
length : 30 mm
Here are the printing parameters : layer : 0,1 mm
shell thickness : 1,2 mm
Top/bottom thickness : 1,2 mm
Infill : 100 %; overlap : 30 %.
Always see the internal layers at the beginning of printing the internal
diameter after the slicing operation to avoid gaps before printing.
Speeds: printing and travelling : 50 mm/s
done with a Raft
Result : better done than with overlap of 15 % above internally and at the beginning externally.
horizontally internal diameter : 9,2 mm.
vertically internal diameter : 9,4 mm.
You see plastic deposition in the hole but no at the other end.
Overlap of 30% is a maximum because in some cases 22% is better.
For a short-middle length it is better to print it vertically.
7. Pipe-bridge ( tuyau-pont ) between lateral supports. Difficult to get a good part.
You see it in white on the left of the cat. It is printed with Cura 15.04.6 on a Ultimaker 2 Go in PLA.
Dimensions : external diameter : 7,4 mm
internally diameter : 4,8 mm.
length : 5 mm.
Parameters : same as the bridge.
Result : Interior : well-done.
Exterior : lightly cavernous at the bottom otherwise is well cylindrical.
Info
Difficulty: ●●●●○
Last updated: January 2018
