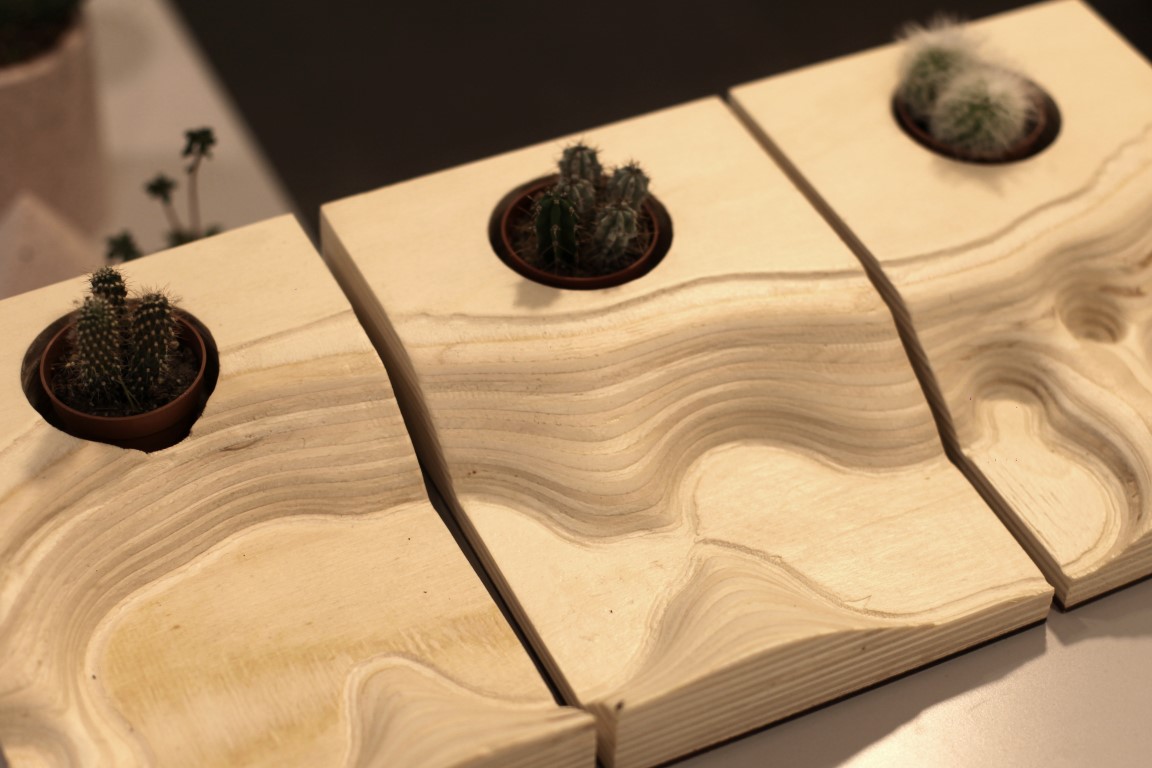
Tiny Canyon
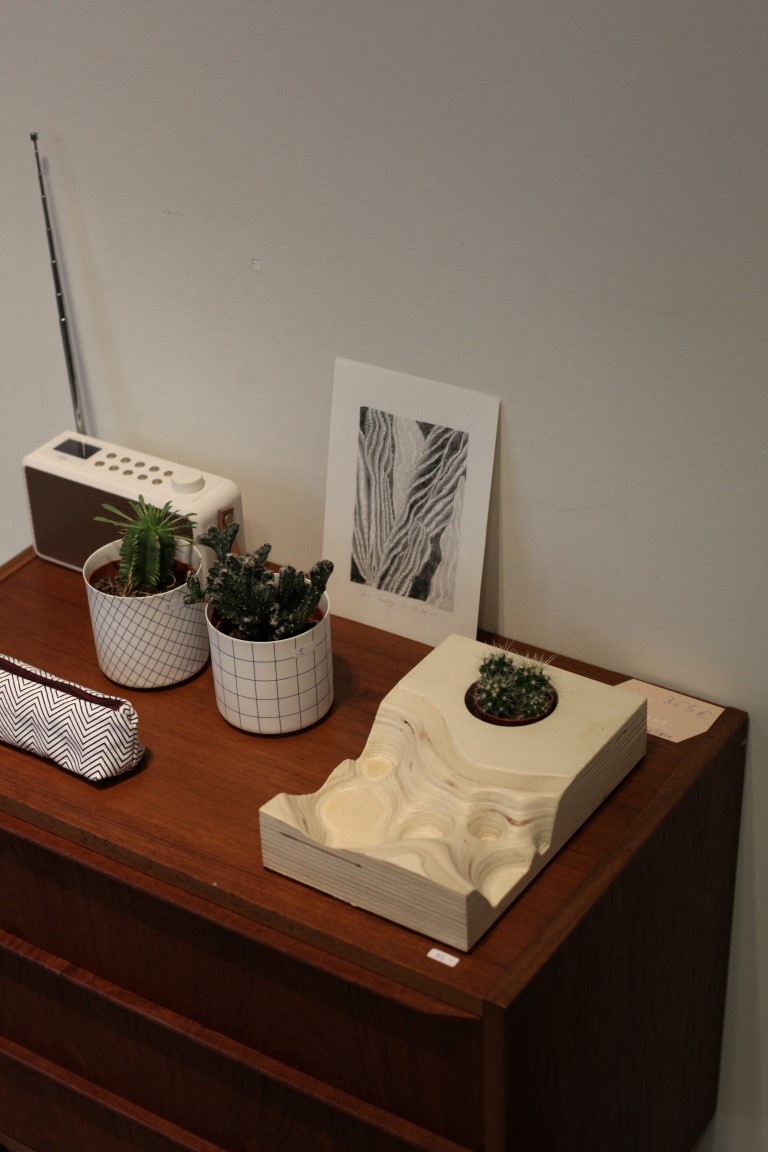
This project was a comission for Fragments, a design and plant shop in Brussels by my friend Eliza Sys. Her shop sells, as it says, design for plants; so cool pots and plant holders for small cactusses.
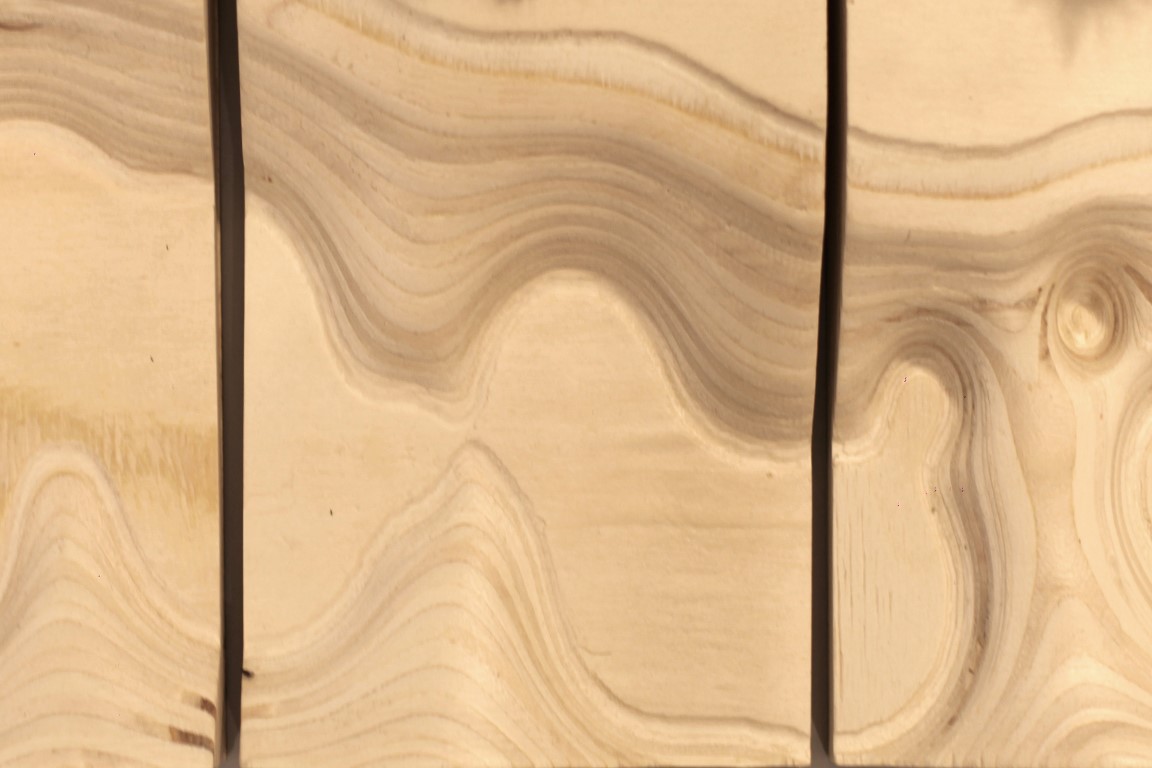
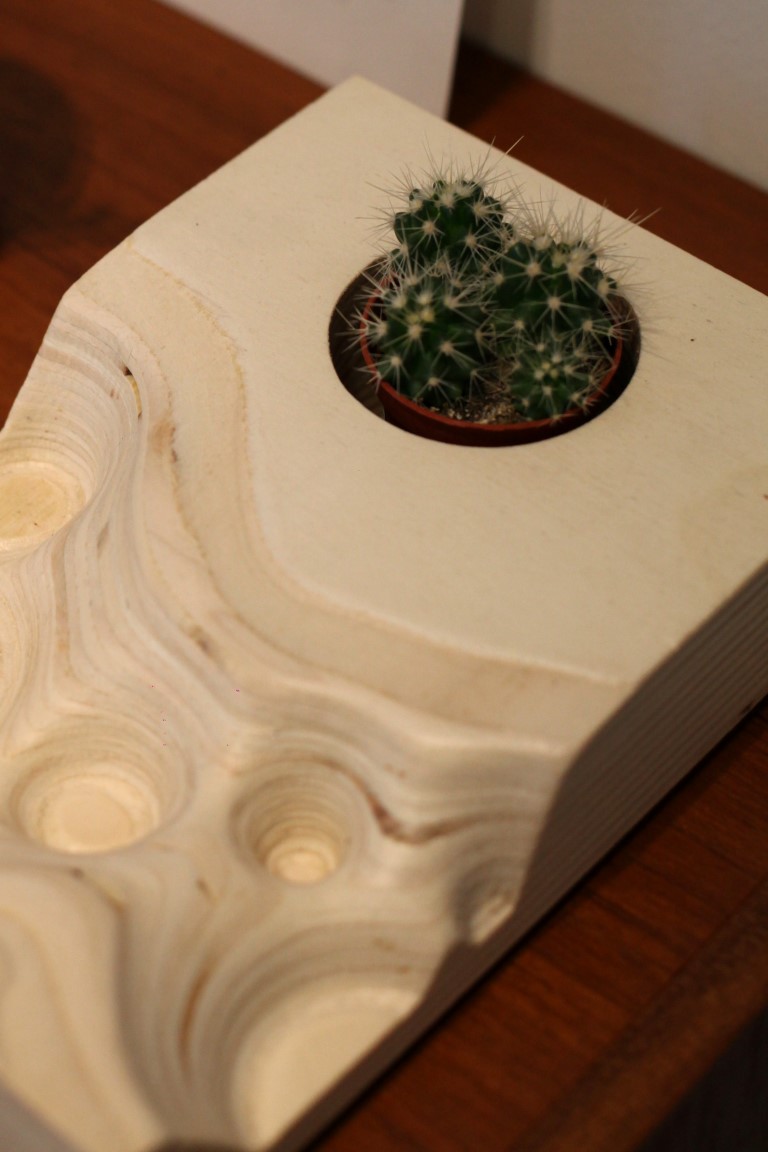
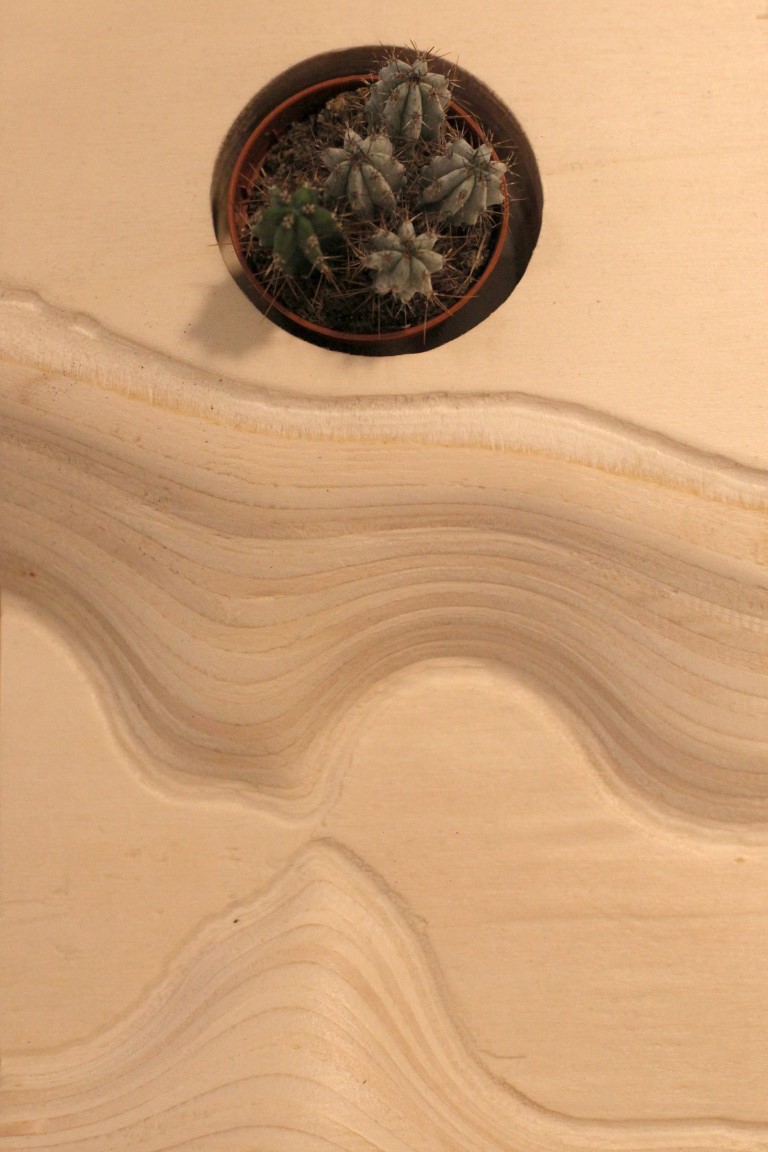
When we started this project, she sent me a moodboard filled with images of California, desserts, cactusses, etc. So the idea very quickly came to make a sort of miniature "Grand Canyon", made out of a plywood volume. By carving into the plywood, the different plywood layers would show up as geological fault lines. Additional holes would host the cactuses. The plan was to make a series of ten, and all then would line up and form one continuous valley. I made one sketch for this project; the final result is strikingly similar to that first idea.
So, the workflow;
Design:
1) I made the 3D design in Rhino3D, with the parametric plugin Grasshopper (GH). GH is a graphical programming environment (not unlike vvvv), that allows you to easily prototype code for Rhino. The algorithm used to make the valleys is akin to the Metaballs algorithm, with loads of tweaking. There is a standard metaballs function in GH, but I wrote my own version in a Python code component.
2) Once the geometry was fixed, I cut it up into then pieces and added the cactus holes. The geometry was then exported as dxf nurbs to Fusion 360.
The first prototype was actually made at Fablabfactory Aalst (by Stijn De Mil). Here, they mostly did the whole set-up for me.
Fabrication preparation:
3) I got two good CNC routing bits from Garnotec, which delivers within 1-3 days to Clabots in Brussels: one flat nose up & down 6mm bit (Z1+1) for roughing, and one round nose upcut 6mm bit (Z2). Not cheap though, about 35€ each...
4) I printed and read the entire how-to for the iMal CNC machine. Other than that, I found two other great online sources:
CNC set-up in Fusion 360, wit great explanation: https://www.instructables.com/lesson/CNC-Router-CAM-Setup/
Calculating Feeds and speeds for the machine: https://www.cncroutershop.com/us_en/calculate-feeds
5) I orderd my wood pre-cut at Lochten & Germeau; each block is 4 x 12mm poplar plywood, + another 3mm sheet to close the hole afterwards
(in hindsight, I would buy the sheet and cut it myself next time, it was a bit expensive. The poplar has a very nice light color, but do mind that it is very soft. Also, because of the color, any fault in the plywood layers (knots etc.) will show up immediately. I might go with something darker and harder next time)
6) I glued the sheets together in blocks with simple wood glue.
7) I predrilled the cactus holes with a column drill and hole saw beforehand (the hole was too deep to do it with the CNC). Not the best idea though; it's a very difficult operation and will burn your wood. Next time, I'd find a workaround with the CNC.
CNC set-up and milling:
7) I followed the before-mentioned online source for my Fusion 360 set-up. Important things to know:
- A VERY IMPORTANT THING TO KNOW WHEN USING THE CNC WITH FUSION: the CNC machine doesn't handle Fusion G-code with high feeds very well; it will produce erros, making the machine lose its' zero, and ruining your workpiece... So allthough you might theoretically get higher feeds, I limited my feedrate to about 3000-4000 mm/min (with a rpm of +- 20 000). It took me quite a while and loads of frustration to figure this out... If the machine starts producing weird errors in the midst of Fusion G-code, just lower the speed. You'll be happy ever after.
- Some Fusion strategies work better than others. Adaptive Clearing for roughing proved very complex, slow, and prone to errors. Pocket Clearing worked perfectly. For finishing, Scallop worked best for me. Parallel is also very prone to errors (it produces high feeds in the operation, see above).
- I used a tolerance of 0.1mm on everything. Roughing stepdown was 2mm, Ramptype Plunge. Finishing stepover was 1 to 1.5mm, which was a bit too rough in hindsight (I had to do a lot of sanding afterwards). To avoid having the finishing operation go to much into flat areas, I used the Slope option (5 to 90 degrees).
- I rehomed the machine to zero between every roughing and finishing. Not sure that was necessary, though.
Every piece took about 1h of machining time (including tool changes and set-up), I think.
Finishing up:
8) As said, it still took a lot of sanding to get the final result (because I had set the finishing stepover too high). In the end, I found and used a sort of sanding sponge head for a dremel. It gave the pieces a nice smooth look.
9) I added a plywood bottom, with the name and logo's laser engraved into them.
10) I varnished them with a very light varnish (Initial Ultramat Blanchon). I can recommend it; there was hardly any colour change, nor drips/traces.
Conclusion:
In the end, I'm very happy with the results. Thing that I could improve in the workflow:
- better planning of the plywood blocks preparation (predrilling of the holes, cutting sheets to size)
- coping with the CNC quirks with Fusion G-code
- finer finishing operation to minimise manual sanding afterwards.
A big thanks again to Xavier for the help!
The pieces are on sale in Fragments' flagship store "79 Art and Design", at Rue des Eperonniers 79 Brussels; and in the Kanal Museum Shop.
Gallery


Info
Date: September 2018 - November 2018
Last updated: November 2018